
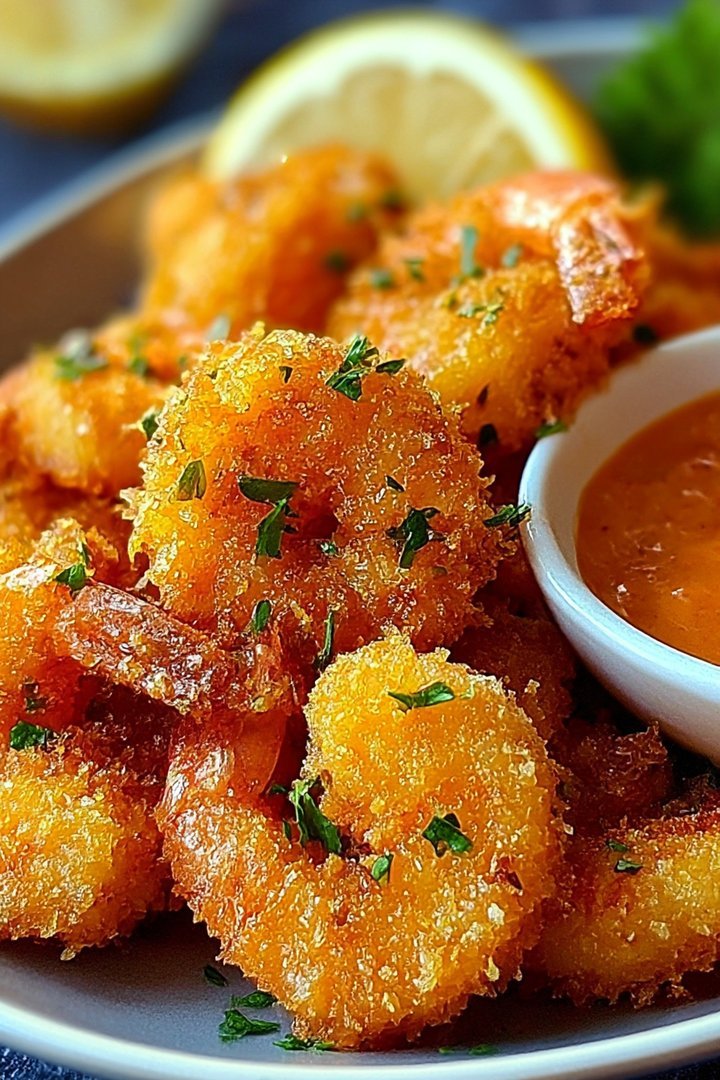
The tantalizing crunch of perfectly fried shrimp, each bite a burst of savory goodness, is simply irresistible. Imagine golden-brown morsels, crispy on the outside and succulent within, a symphony of textures and flavors that dance across your palate.
This **crispy fried shrimp** recipe isn’t just food; it’s an experience, a culinary adventure that brings joy and satisfaction. It’s perfect for casual gatherings, family dinners, or even a solo treat when you crave something truly special.
- Achieve restaurant-quality crispiness without the restaurant price tag, using simple techniques you can master at home.
- Enjoy an explosion of flavor with a perfectly balanced blend of spices that complements the natural sweetness of the shrimp.
- Impress your friends and family with a visually stunning dish that looks as good as it tastes, a guaranteed crowd-pleaser.
- Customize your **crispy fried shrimp** with various dipping sauces, making it a versatile dish suitable for any occasion.
Ingredients for Crispy Fried Shrimp
Here’s what you’ll need to make this delicious dish:
The full ingredients list, including measurements, is provided in the recipe card directly below.
How to Make Crispy Fried Shrimp
Follow these simple steps to prepare this delicious dish:
Step 1: Prepare the Shrimp
Rinse the shrimp under cold water and pat them dry with paper towels. This helps the coating adhere better. In a bowl, combine the shrimp with a pinch of salt and pepper.
Step 2: Prepare the Coating
In a shallow dish, whisk together the flour, cornstarch, salt, pepper, garlic powder, onion powder, and paprika. In another shallow dish, whisk together the eggs and milk.
Step 3: Coat the Shrimp
Dredge each shrimp in the flour mixture, ensuring it’s fully coated. Dip the flour-coated shrimp in the egg mixture, then dredge it again in the flour mixture. This double coating will give you extra **crispy fried shrimp**.
Step 4: Fry the Shrimp
Heat vegetable oil in a large skillet over medium-high heat. Carefully add the coated shrimp to the hot oil in a single layer, being careful not to overcrowd the pan. Fry for 2-3 minutes per side, or until golden brown and cooked through.
Step 5: Drain and Serve
Remove the **crispy fried shrimp** from the skillet and place them on a plate lined with paper towels to drain excess oil. Serve immediately with your favorite dipping sauce, such as sweet chili sauce, tartar sauce, or a squeeze of lemon.
Transfer to plates and serve immediately with lemon wedges and your preferred dipping sauce for the perfect finishing touch.
Perfecting the Cooking Process
For the ultimate experience with crispy fried shrimp, orchestrate your kitchen ballet. Start by prepping all ingredients. This way, when the oil is ready, you’re not scrambling for lemons or the dipping sauce while your precious shrimp sizzles too long. Timing is everything!
Add Your Touch
Don’t be afraid to get creative with your batter. A dash of smoked paprika can add depth. For a bit of heat, try a pinch of cayenne pepper. Also, experiment with different dipping sauces beyond the usual tartar sauce. Mango salsa or a sweet chili sauce can take it up a notch.
Storing & Reheating
Ideally, crispy fried shrimp should be enjoyed immediately. However, if you have leftovers, store them in an airtight container in the refrigerator. To reheat, use an air fryer or bake in a preheated oven to help restore some of the crispness. Microwaving is not recommended.
Here are some tips to elevate your crispy fried shrimp game:
- Pat the shrimp completely dry before dredging. Excess moisture is the enemy of crispiness, so be thorough with the paper towels.
- Don’t overcrowd the pan or fryer! Work in batches to maintain the oil temperature and ensure even cooking for supremely crispy shrimp.
- Immediately after frying, place the shrimp on a wire rack to drain excess oil. This prevents them from getting soggy and keeps them delightfully crunchy.
(Personal anecdote formated as paragraph subheading)
I remember the first time I made this for my friends; they were so excited. One even said it tasted like it came from a restaurant! I knew then I’d nailed the recipe.
Conclusion for Crispy Fried Shrimp:
Mastering the art of **crispy fried shrimp** is within your reach! Remember the crucial steps: thoroughly dry those shrimp, employ the double-dredge method for maximum crunch, and don’t overcrowd the pan. Choose the right oil and ensure it’s hot enough to work its magic. By following these simple tips, you’ll be enjoying perfectly **crispy fried shrimp**. Say goodbye to soggy sadness and hello to golden, crunchy bliss!
Print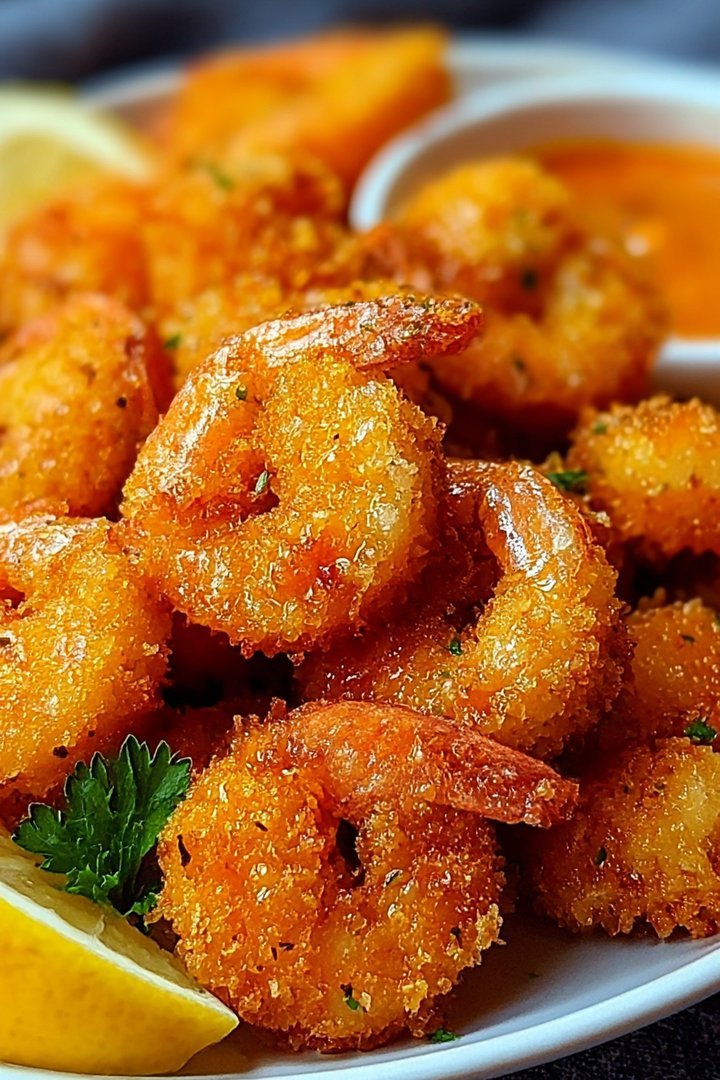
Crispy Fried Shrimp
Delicious crispy fried shrimp recipe with detailed instructions and nutritional information.
- Total Time: 35 minutes
- Yield: 4 servings
Ingredients
- Large shrimp, peeled and deveined: 1 pound
- All-purpose flour: 1 cup
- Cornstarch: 1/2 cup
- Baking powder: 1 teaspoon
- Salt: 1 teaspoon
- Black pepper: 1/2 teaspoon
- Garlic powder: 1/2 teaspoon
- Vegetable oil: 3 cups
Instructions
- Step 1: In a medium bowl, whisk together the flour, cornstarch, baking powder, salt, pepper, and garlic powder.
- Step 2: Heat the vegetable oil in a large, heavy-bottomed pot or deep fryer to 350°F (175°C).
- Step 3: Dredge each shrimp in the flour mixture, ensuring it is fully coated. Shake off any excess flour.
- Step 4: Carefully place the coated shrimp into the hot oil in batches, being careful not to overcrowd the pot.
- Step 5: Fry the shrimp for 2-3 minutes, or until golden brown and crispy.
- Step 6: Remove the shrimp from the oil with a slotted spoon and place them on a wire rack lined with paper towels to drain excess oil. Serve immediately.
Notes
- Store leftover fried shrimp in an airtight container in the refrigerator for up to 2 days.
- To reheat, bake the shrimp on a wire rack in a preheated 350°F oven for 5-7 minutes until crispy.
- Serve these crispy shrimp immediately with your favorite dipping sauce, like sweet chili or cocktail sauce, for the best flavor.
- For extra crispy shrimp, ensure they are completely dry before dredging them in the flour mixture.
- Prep Time: 15 minutes
- Cook Time: 20 minutes
- Method: Stovetop
- Cuisine: American
FAQs:
What’s the secret to truly Crispy Fried Shrimp?
Ah, the million-dollar question! Forget about soggy disappointments; the key lies in the preparation. First, make sure your shrimp are incredibly dry. Pat them down with paper towels like they just finished a swim meet. Second, use a double-dredging technique. Flour, egg wash, then seasoned breadcrumbs – it’s like building a tiny, delicious fortress. Third, and this is crucial, don’t overcrowd the pan! Give those shrimp room to breathe so the hot oil can work its magic and create that glorious, golden crunch.
Can I use frozen shrimp for Crispy Fried Shrimp?
Absolutely! Frozen shrimp are a lifesaver when you’re craving a quick and tasty meal. The trick is to thaw them properly. Don’t even *think* about microwaving them! Instead, place them in a colander under cool running water until they’re fully thawed. Then, follow my golden rule: dry, dry, dry! Seriously, pat them down until you feel like you’ve personally absorbed all the moisture. Excess water is the enemy of crispy. After that, proceed with the recipe as usual.
What kind of oil is best for frying Crispy Fried Shrimp?
Choosing the right oil is like picking the right music for a party—it sets the mood. You want an oil with a high smoke point, meaning it can handle high temperatures without breaking down and tasting funky. Canola oil, vegetable oil, or peanut oil are all excellent choices. Avoid olive oil, as its smoke point is too low and it will leave an undesirable taste. Remember, we’re aiming for crispy perfection, not oily sadness!
How do I keep my Crispy Fried Shrimp from getting soggy?
Sogginess is the ultimate fried food foe. Prevention is key! First, make sure your oil is hot enough. If it’s too cool, the shrimp will absorb the oil instead of getting crispy. Second, don’t pile the finished shrimp on top of each other. Place them in a single layer on a wire rack set over a baking sheet. This allows air to circulate, preventing moisture from building up. And finally, serve them immediately! The longer they sit, the higher the chance of sogginess sneaking in.

Leave a Comment