
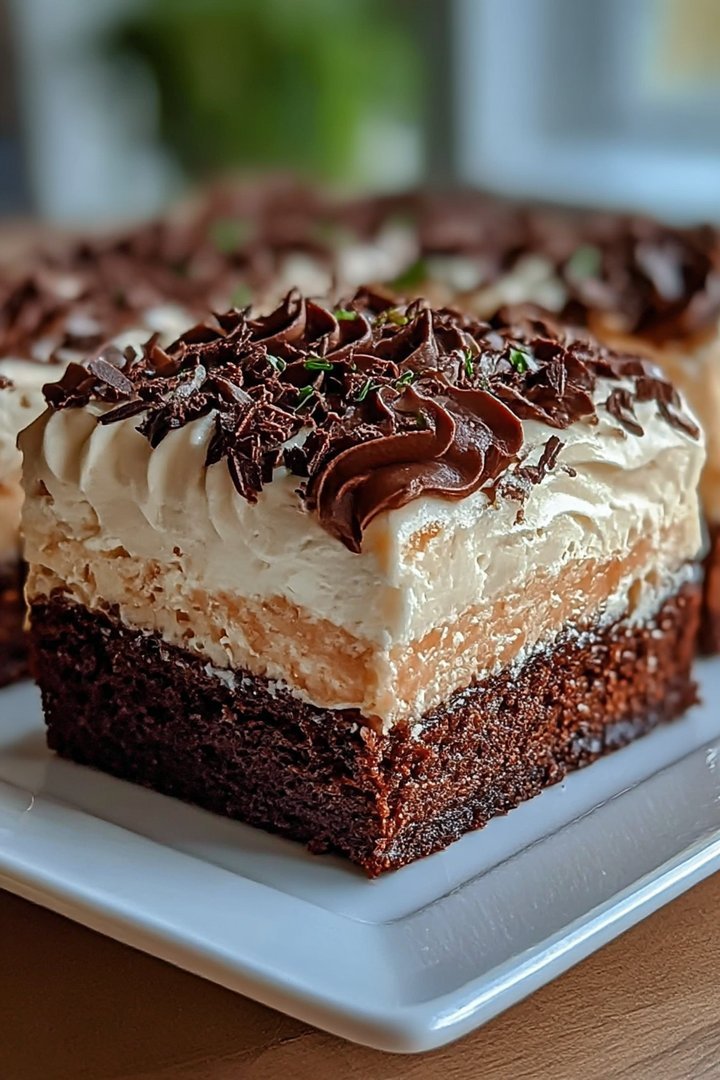
Imagine biting into a slice of pure bliss: layers of rich, fudgy brownies swirled with cool, creamy filling, a symphony of textures that dance on your palate. This Brownie Refrigerator Cake isn’t just dessert; it’s an experience, a delectable escape from the ordinary.
Think back to summer afternoons, the sun blazing, and the sweet anticipation of a no-bake treat waiting patiently in the fridge. Our Brownie Refrigerator Cake captures that simple joy, offering a decadent dessert that requires absolutely no oven time. The perfect finale for any get-together.
- Effortless to make: This cake is so easy, it’s practically foolproof, even for kitchen novices.
- Indulgent flavor: Fudgy brownie layers meet a light and airy filling for a taste of pure heaven.
- Visually stunning: Layers of chocolate and cream create a show-stopping dessert.
- Adaptable delight: Customize the filling with your favorite flavors and toppings.
Ingredients for Brownie Refrigerator Cake
Here’s what you’ll need to make this delicious dish:
The full ingredients list, including measurements, is provided in the recipe card directly below.
How to Make Brownie Refrigerator Cake
Follow these simple steps to prepare this delicious dish:
Step 1: Bake the Brownies
Prepare the brownie mix according to the package directions, using the eggs and oil. Bake in a 9×13 inch pan as directed. Let the brownies cool completely.
Step 2: Prepare the Pudding Filling
In a large bowl, whisk together the instant chocolate pudding mix and milk until smooth. Let it sit for a couple of minutes to thicken slightly.
Step 3: Beat the Cream Cheese
In a separate bowl, beat the softened cream cheese until smooth and creamy. This ensures a lump-free filling.
Step 4: Combine the Filling
Gently fold the whipped topping into the thickened pudding mixture, then fold in the cream cheese until well combined. Be careful not to overmix.
Step 5: Assemble the Cake
Cut the cooled brownies into bite-sized pieces. In a large serving bowl or trifle dish, create a layer of brownies, followed by a layer of the pudding mixture. Repeat the layers until all the brownies and pudding are used, ending with a layer of pudding on top.
Step 6: Chill and Garnish
Cover the cake with plastic wrap and refrigerate for at least 4 hours, or preferably overnight, to allow the flavors to meld. Before serving, garnish with chocolate shavings or sprinkles.
Transfer to plates and enjoy this cool, refreshing, and utterly irresistible Brownie Refrigerator Cake!
Perfecting the Cooking Process
To achieve the best **brownie refrigerator cake**, start by baking the brownies first and let them cool completely. While the brownies are cooling, prepare your creamy layers and assemble everything once the base is ready. This ensures that the cake sets up perfectly in the refrigerator.
Add Your Touch
Feeling adventurous? Swap out the usual chocolate brownies for blondies, or add a layer of raspberry jam for a fruity kick. Consider a sprinkle of chopped nuts or chocolate shavings on top for extra texture and flavor. It’s your **brownie refrigerator cake**, make it sing!
Storing & Reheating
Keep your **brownie refrigerator cake** chilled in the fridge for up to three days. It’s best served cold, so there’s no need for reheating. Just slice and enjoy straight from the refrigerator for a refreshing treat.
Here are some tips that will make you a brownie refrigerator cake master:
- Use high-quality cocoa powder for the richest chocolate flavor in your brownie base; it makes a noticeable difference.
- Chill each layer separately before assembling the whole cake for cleaner slices and a more stable final product.
- Don’t overbake the brownies; slightly underbaking keeps them fudgy, which complements the creamy layers perfectly.
(Personal anecdote formated as paragraph subheading)
My cousin once declared my brownie refrigerator cake “better than therapy,” which I’m pretty sure means it’s a compliment of the highest order. It’s always a crowd-pleaser!
The Brownie Refrigerator Cake Revelation
Let’s talk about the **brownie refrigerator cake**. Not just *any* cake, mind you. We’re talking about a dessert that’s the edible equivalent of a warm hug on a summer day. It’s the dessert that asks, “Why choose between brownies and cake when you can have *both*?” And honestly, who are we to argue with such profound logic?
I stumbled upon this beauty quite by accident, as most great food inventions are born. It all started with a leftover batch of brownies (a rare occurrence, I assure you), a craving for something cold and creamy, and a general reluctance to turn on the oven again. Necessity, as they say, is the mother of ridiculously delicious inventions.
So, here we are, ready to embark on a culinary adventure that requires minimal baking, maximum flavor, and zero regrets. Get ready to meet your new favorite dessert: the **brownie refrigerator cake**.
The Anatomy of Awesomeness: What You’ll Need
Before we dive headfirst into brownie bliss, let’s gather our supplies. Think of this as your mission briefing before a top-secret dessert operation.
The Brownie Base: Fudgy Foundation
For the brownie layer, you will require:
- 1 cup all-purpose flour: The backbone of our brownie dreams.
- 1 cup granulated sugar: Sweetness and light, my friends.
- ½ cup unsweetened cocoa powder: The darker, the better, I always say.
- ½ teaspoon baking powder: For that perfect rise.
- ¼ teaspoon salt: To balance the sweet and enhance the chocolate.
- ½ cup vegetable oil: Moistness is key.
- 2 large eggs: Binding it all together.
- ½ cup milk: Because even brownies need a little hydration.
- 1 teaspoon alcohol-free vanilla extract: The secret weapon for deliciousness.
The Creamy Layers: Cloud Nine in a Cake
Next, for the creamy, dreamy layers, prepare the following:
- 8 ounces cream cheese, softened: The star of the show.
- 1 cup powdered sugar: Sweetness and a smooth texture.
- 1 teaspoon alcohol-free vanilla extract: Because you can never have too much vanilla.
- 2 cups heavy cream: Whipped to perfection, of course.
The Optional (But Highly Recommended) Toppings
Finally, consider these toppings for added flair:
- Chocolate shavings: Because chocolate on chocolate is never wrong.
- Chopped nuts (walnuts, pecans, almonds): For a little crunch.
- Fresh berries (strawberries, raspberries, blueberries): A pop of color and freshness.
- Caramel sauce: Because why not?
Assembling Your Masterpiece: The Step-by-Step Guide
Now that we’re armed with our ingredients, let’s get down to business. This is where the magic happens, folks.
Baking the Brownie Base: The Foundation of Fun
1. Preheat your oven to 350°F (175°C). Grease and flour an 8×8 inch baking pan. We don’t want any brownie casualties due to sticking.
2. In a large bowl, whisk together the flour, sugar, cocoa powder, baking powder, and salt. Make sure there are no cocoa clumps trying to hide.
3. In a separate bowl, whisk together the oil, eggs, milk, and alcohol-free vanilla extract. This is your wet dream team.
4. Pour the wet ingredients into the dry ingredients and stir until *just* combined. Overmixing is the enemy of fudgy brownies.
5. Pour the batter into the prepared pan and bake for 25-30 minutes, or until a toothpick inserted into the center comes out with moist crumbs. Remember, slightly underbaked is better than overbaked!
6. Let the brownies cool completely in the pan. Patience, young grasshopper. This is crucial.
Creating the Creamy Layers: Whipped Wonder
1. In a large bowl, beat the softened cream cheese with the powdered sugar and alcohol-free vanilla extract until smooth and creamy. No lumps allowed!
2. In a separate bowl, whip the heavy cream until stiff peaks form. This is where your arm workout comes in. Alternatively, use a stand mixer and let it do the heavy lifting.
3. Gently fold the whipped cream into the cream cheese mixture until everything is evenly combined. Be gentle! We want fluffy, not deflated.
Assembling the Brownie Refrigerator Cake: The Grand Finale
1. Once the brownies are completely cool, cut them in half horizontally. This will give you two layers of brownie goodness.
2. Place one brownie layer in the bottom of your serving dish or pan.
3. Spread half of the cream cheese mixture evenly over the brownie layer.
4. Top with the second brownie layer.
5. Spread the remaining cream cheese mixture over the top.
6. Cover the cake and refrigerate for at least 4 hours, or preferably overnight. This allows the layers to meld together into a symphony of flavor.
Adding the Finishing Touches: The Cherry on Top (Literally)
1. Before serving, garnish your **brownie refrigerator cake** with chocolate shavings, chopped nuts, fresh berries, and a drizzle of caramel sauce. Get creative! This is your chance to shine.
2. Slice, serve, and prepare for rave reviews.
Variations on a Theme: Remixing the Recipe
The beauty of the **brownie refrigerator cake** lies in its versatility. Feel free to experiment and make it your own!
Peanut Butter Paradise: A Nutty Notion
Add a layer of peanut butter frosting between the brownie and cream cheese layers. Because peanut butter and chocolate are a match made in dessert heaven.
Mint Chocolate Mania: A Refreshing Twist
Add a few drops of peppermint extract to the cream cheese mixture and garnish with crushed peppermint candies. This will wake up your taste buds!
Mocha Madness: Coffee Lover’s Dream
Add a tablespoon of instant coffee powder to the brownie batter and a teaspoon of coffee extract to the cream cheese mixture. For the coffee obsessed.
Caramel Crunch: A Sweet Sensation
Swirl caramel sauce into the cream cheese mixture and sprinkle crushed toffee bars on top. This one is for the serious sweet tooths.
Troubleshooting Tips: Avoiding Dessert Disasters
Even the best bakers encounter hiccups. Here are a few tips to avoid common pitfalls.
- **Brownies too dry?** Add a tablespoon of sour cream or yogurt to the batter for extra moisture.
- **Cream cheese mixture too thin?** Make sure your cream cheese is softened to room temperature before beating it. If it’s still too thin, add a tablespoon of cornstarch.
- **Cake not setting properly?** Make sure you refrigerate it for at least 4 hours, or preferably overnight. If it’s still not setting, you may need to add a stabilizer like agar-agar (following package directions) to the cream cheese mixture.
Why This Brownie Refrigerator Cake is the Best Thing Since Sliced Bread (Okay, Maybe Brownies)
This **brownie refrigerator cake** isn’t just a dessert; it’s an experience. It’s the perfect combination of fudgy brownies, creamy layers, and customizable toppings. It’s easy to make, requires minimal baking, and is guaranteed to impress.
So, what are you waiting for? Go forth and bake (or, you know, assemble) your own **brownie refrigerator cake** masterpiece. Your taste buds will thank you.
Share Your Creations!
Don’t forget to share your **brownie refrigerator cake** creations with me! Tag me in your photos on social media, and let me know what variations you tried. I can’t wait to see what deliciousness you come up with!
I hope you liked this super yummy dessert recipe.
Conclusion for Brownie Refrigerator Cake :
This Brownie Refrigerator Cake is the ultimate dessert for those times you crave something indulgent without spending hours in the kitchen. With layers of fudgy brownies, creamy pudding, and your favorite toppings, this no-bake treat is guaranteed to be a crowd-pleaser. It’s easy to customize with different brownie and pudding flavors, making it perfect for any occasion. So gather your ingredients, embrace the simplicity, and prepare to be amazed by this delicious, fuss-free dessert!
Print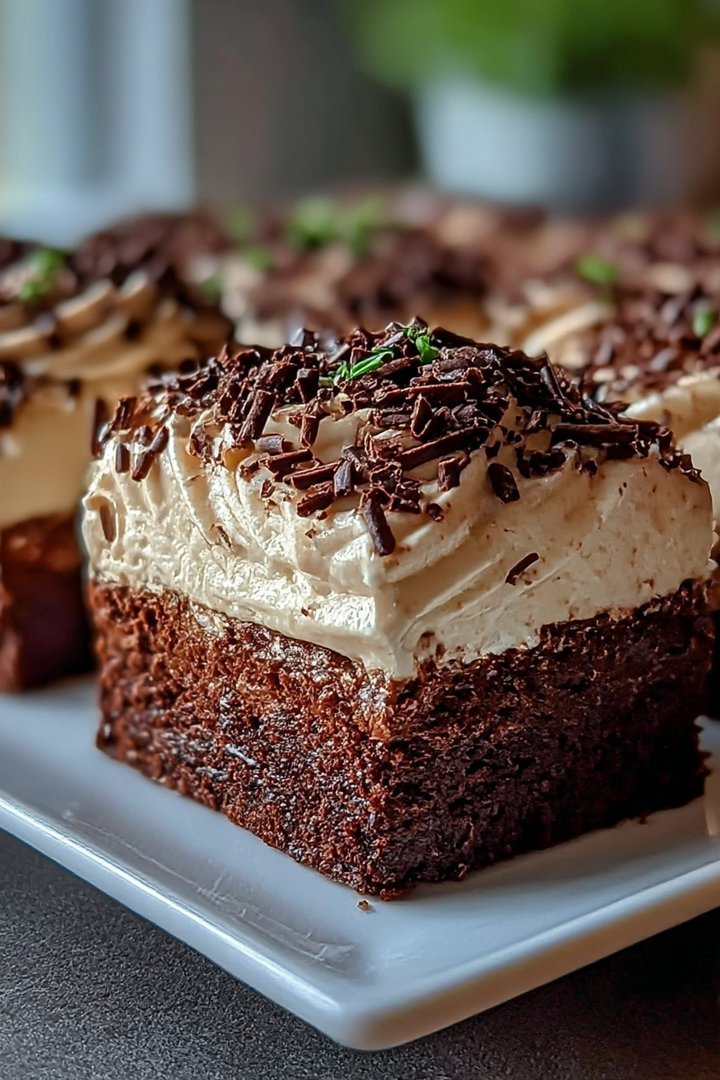
Brownie Refrigerator Cake
Delicious brownie refrigerator cake recipe with detailed instructions and nutritional information.
- Total Time: 35 minutes
- Yield: 4 servings
Ingredients
- Boxed brownie mix: 1 (13×9-inch pan size)
- Eggs: As called for by brownie mix
- Vegetable oil: As called for by brownie mix
- Water: As called for by brownie mix
- Instant vanilla pudding mix: 1 (3.4 ounce) package
- Milk: 2 cups
- Whipped topping: 8 ounces, thawed
- Chocolate syrup: For drizzling
Instructions
- Step 1: Prepare brownie mix according to package directions, baking in a 13×9-inch pan. Let cool completely.
- Step 2: While the brownie is cooling, prepare the instant vanilla pudding according to package directions using 2 cups of milk. Whisk until smooth and thickened.
- Step 3: Once the brownie is cool, spread the prepared vanilla pudding evenly over the top.
- Step 4: Spread the thawed whipped topping over the pudding layer, covering it completely.
- Step 5: Drizzle chocolate syrup over the whipped topping.
- Step 6: Cover the cake and refrigerate for at least 2 hours before serving. This allows the flavors to meld together and the cake to set.
Notes
- Store leftovers in the refrigerator for up to 3 days, covered, to keep the brownie moist and the topping fresh.
- For a softer brownie, let individual slices sit at room temperature for about 10-15 minutes before serving, but don't let the topping melt.
- Serve chilled slices with a scoop of vanilla ice cream for an extra decadent treat.
- For a richer flavor, use chocolate pudding instead of vanilla, or add a teaspoon of instant coffee powder to the brownie batter before baking.
- Prep Time: 15 minutes
- Cook Time: 20 minutes
- Method: Stovetop
- Cuisine: American
FAQs :
Can I use store-bought brownies for this Brownie Refrigerator Cake?
Absolutely! While homemade brownies definitely bring a certain *je ne sais quoi* to the party, store-bought brownies are a fantastic shortcut. Look for fudgy brownies – the gooier, the better! Cut them into bite-sized pieces for easy layering. This is all about ease and enjoyment. Swapping in pre-made brownies shaves off considerable prep time, leaving you more time to, say, strategically position yourself near the fridge for optimal snacking access. It’s a delicious recipe that can be tailored to your convenience. So go ahead, embrace the shortcut!
What kind of pudding works best in a Chocolate Brownie Refrigerator Cake?
For maximum decadence, chocolate pudding is the reigning champion in this delicious treat. Its rich, creamy texture complements the fudgy brownies beautifully. But don’t let that limit your creativity! Vanilla pudding provides a lovely contrast, or even a swirl of peanut butter pudding for a truly decadent twist. Consider dulce de leche pudding for a caramel layer that will knock your socks off. The key is to choose a pudding flavor that you adore and that will play well with the brownies. Experiment and find your perfect pudding pairing!
How long does this Refrigerator Brownie Dessert Cake last?
This delightful dessert is best enjoyed within 2-3 days. After that, the brownies tend to get a bit soggy, and nobody wants a soggy brownie! Store it tightly covered in the refrigerator to maintain its freshness. While it might still technically be edible after a few days, the texture won’t be quite as amazing. Consider this a fantastic excuse to gather friends and family to help you polish it off sooner rather than later. It’s a dessert that’s made to be shared, and disappears pretty fast anyway, so plan accordingly!
Can I add fruit to this Brownie Refrigerator Cake Recipe?
You bet! Fresh berries are a phenomenal addition to this sweet treat. Strawberries, raspberries, or blueberries provide a burst of tartness that cuts through the richness of the chocolate. Sliced bananas or peaches would also be delicious. Consider layering the fruit between the brownies and pudding, or arrange them decoratively on top. Adding fruit not only enhances the flavor but also makes the dessert look even more appealing. It’s a simple way to elevate this already fantastic treat.


Leave a Comment