
The aroma of tangy sweetness wafts through the kitchen, a promise of the delectable **baked sweet and sour chicken** that’s about to grace our plates. Each bite delivers a symphony of flavors, making it an irresistible culinary adventure.
This isn’t just a meal; it’s a joyous occasion on a plate, perfect for family dinners, casual gatherings, or even a solo feast. Imagine tender chicken pieces glazed in a vibrant, homemade sauce, a dish so good, it turns even Mondays into a celebration!
Here are a few reasons why you’ll absolutely adore this **baked sweet and sour chicken** recipe:
- It is incredibly easy to prepare, even for kitchen novices, with simple steps leading to a restaurant-quality result.
- The flavor profile is a harmonious blend of sweet and tangy, creating an explosion of deliciousness in every mouthful that will delight everyone.
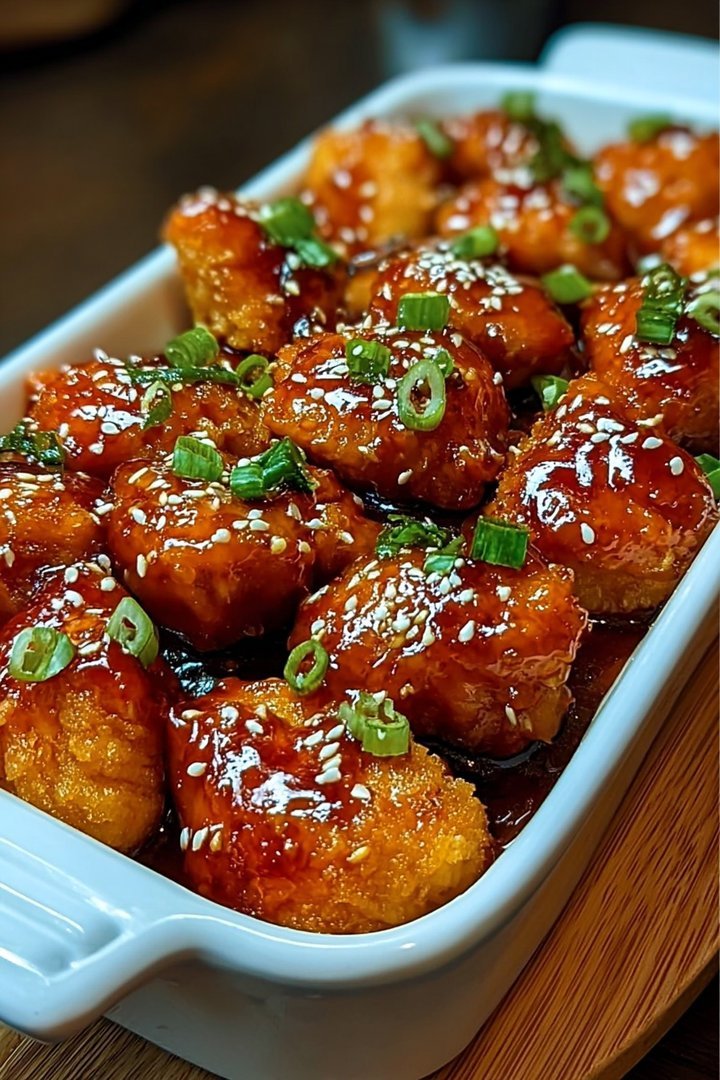
- The vibrant colors of the glazed chicken and accompanying vegetables make this dish a feast for the eyes, enticing everyone to dig in.
- This recipe is incredibly versatile, pairing well with rice, noodles, or a fresh salad, adapting to whatever your cravings may be.
Ingredients for Baked Sweet and Sour Chicken
Here’s what you’ll need to make this delicious dish:
The full ingredients list, including measurements, is provided in the recipe card directly below.
How to Make Baked Sweet and Sour Chicken
Follow these simple steps to prepare this delicious dish:
Step 1: Prepare the Chicken and Vegetables
Preheat your oven to 375°F (190°C). While the oven heats, cut the chicken breasts into 1-inch pieces. In a large bowl, combine the chicken, chopped bell peppers, and onion.
Step 2: Mix the Sauce
In a separate bowl, whisk together the ketchup, brown sugar, apple cider vinegar, soy sauce, chicken broth, cornstarch, and garlic powder until well combined. Ensure there are no lumps of cornstarch.
Step 3: Combine and Bake
Pour the sweet and sour sauce over the chicken and vegetable mixture. Add the pineapple chunks and stir everything together until the chicken and vegetables are evenly coated in the sauce. Transfer the mixture to a 9×13 inch baking dish.
Step 4: Bake to Perfection
Bake in the preheated oven for 30-35 minutes, or until the chicken is cooked through and the sauce has thickened to a glossy consistency. Stir the mixture halfway through the baking time to ensure even cooking.
Step 5: Garnish and Serve
Once baked, remove from the oven and let it cool slightly before serving. Garnish with toasted sesame seeds for added flavor and visual appeal.
Transfer to plates and serve hot with steamed rice or noodles for a complete and satisfying meal.
Perfecting the Cooking Process
For the most delicious outcome, start by browning your chicken pieces to lock in those savory juices. While the chicken rests, kickstart your sauce. Ensure everything comes together harmoniously, allowing the flavors to meld beautifully for an unforgettable dish.
Add Your Touch
Feel free to experiment! Not a fan of pineapple? Try mandarin oranges. Want a bit more kick? Add a pinch of red pepper flakes. This recipe is a blank canvas; let your taste buds be your guide. Make it uniquely yours and enjoy the creation.
Storing & Reheating
Got leftovers? Lucky you! Store your sweet and sour chicken in an airtight container in the fridge for up to three days. Reheat gently in a pan or microwave, stirring occasionally, until heated through. Enjoy it just as deliciously as the first time!
Here are a few golden nuggets of wisdom to elevate your Baked Sweet and Sour Chicken game:
- Don’t overcrowd the pan when browning the chicken; work in batches to achieve that perfect golden-brown crust for maximum flavor.
- Balance the sweet and sour elements by tasting and adjusting the sauce as you go. A little extra vinegar or honey can make a big difference.
- Let the chicken rest in the sauce for a few minutes after baking. This allows the flavors to fully infuse, creating a richer and more delicious dish.
(Personal anecdote formated as paragraph subheading (very important! don’t write any title for this paragraph))
I remember the first time I made this for a potluck. It disappeared so fast I almost didn’t get any! Now, I always make a double batch. Everyone raves about it!
Baked Sweet and Sour Chicken. Just the name conjures up images of glistening, tangy, and utterly irresistible deliciousness. Forget takeout menus and questionable ingredients – we’re diving headfirst into creating a homemade version that’s not only healthier but also packed with flavor that’ll knock your socks off. This isn’t your average, run-of-the-mill chicken dish. This is *Baked Sweet and Sour Chicken*, elevated to rockstar status.
Why This Baked Sweet and Sour Chicken Will Rock Your World
Let’s face it, some days you just crave that sweet and sour tang. But the thought of ordering greasy takeout fills you with dread. Enter this recipe. It’s the perfect compromise. It satisfies your cravings while giving you control over the ingredients. You can customize the sweetness, the sourness, and even the level of spice. Plus, baking the chicken makes it significantly healthier than frying. And the best part? It’s surprisingly easy to make. Even if you’re a novice cook, you can totally nail this.
This recipe is a symphony of flavors and textures. You get the crispy, slightly caramelized chicken. Then you get the vibrant, tangy, and sweet sauce that coats every morsel. The addition of colorful veggies adds a satisfying crunch and a boost of nutrients. It’s a complete meal that’s both satisfying and exciting. Forget bland dinners! This dish is a party in your mouth.
The Star of the Show: Chicken (and Its Preparation)
We’re using chicken breasts for this recipe, but you could easily swap them out for chicken thighs if you prefer. Just adjust the cooking time accordingly. The key to juicy, flavorful chicken is to start with good quality meat and to properly prepare it.
First, you’ll want to cut the chicken into bite-sized pieces. This ensures even cooking and makes it easier to eat. Next, we’re going to give the chicken a light coating of cornstarch. This is the secret to achieving that crispy exterior we all crave. The cornstarch helps to absorb moisture and create a beautiful crust when baked.
Crafting the Perfect Sweet and Sour Sauce
Now, let’s talk about the sauce. This is where the magic happens. We’re aiming for a balance of sweet, sour, and savory flavors that will tantalize your taste buds. The base of our sauce is a combination of apple cider vinegar (for that essential tang), pineapple juice (for sweetness and tropical vibes), and soy sauce (for umami goodness).
But we’re not stopping there. We’re also adding a touch of ketchup (for richness and depth), brown sugar (for caramel-like sweetness), and a pinch of ginger and garlic (for aromatic complexity). The key is to taste as you go and adjust the ingredients to your liking. Want it sweeter? Add more brown sugar. Prefer it more sour? Add a splash more vinegar. This is your sauce, so make it your own!
Veggies: The Colorful Crew
No sweet and sour chicken is complete without a medley of colorful veggies. We’re using bell peppers (red, green, and yellow for maximum visual appeal and nutritional value), onions (for that savory bite), and pineapple chunks (because, well, it’s sweet and sour chicken!).
Feel free to get creative with your veggie choices. Broccoli florets, carrot slices, snap peas, and water chestnuts would all be fantastic additions. The important thing is to choose veggies that will hold their shape and texture during baking. You don’t want them to turn to mush.
Putting It All Together: Baking Your Masterpiece
Now for the fun part: assembling and baking your Baked Sweet and Sour Chicken. In a large bowl, combine the cornstarch-coated chicken, the veggies, and the sweet and sour sauce. Toss everything together until well coated.
Spread the mixture evenly in a baking dish and pop it into the oven. The baking time will depend on the size of your chicken pieces and the temperature of your oven. But generally, it should take about 20-25 minutes, or until the chicken is cooked through and the veggies are tender-crisp.
Serving Suggestions: From Simple to Spectacular
Once your Baked Sweet and Sour Chicken is cooked to perfection, it’s time to serve it up. The classic accompaniment is steamed rice. But you could also serve it with quinoa, noodles, or even mashed potatoes.
For a more elaborate presentation, garnish the dish with sesame seeds and chopped green onions. These simple additions add a pop of color and a subtle nutty flavor. And if you’re feeling extra fancy, serve it with a side of homemade egg rolls or spring rolls.
Making it a Meal Prep Marvel
This Baked Sweet and Sour Chicken is a fantastic meal prep option. You can easily make a big batch on Sunday and enjoy it for lunch or dinner throughout the week. The flavors actually meld and improve over time, so it’s even better the next day.
Just store the cooked chicken and veggies in an airtight container in the refrigerator. When you’re ready to eat, simply reheat it in the microwave or oven. You can also add a splash of water or broth to keep it from drying out.
Baked Sweet and Sour Chicken: A Healthier Takeout Alternative
This recipe is all about enjoying your favorite flavors without sacrificing your health. By baking the chicken instead of frying it, we’re significantly reducing the fat content. And by using homemade sauce, we’re avoiding all the artificial ingredients and preservatives that are often found in store-bought sauces.
So go ahead, indulge in a guilt-free version of your favorite takeout dish. Your taste buds (and your body) will thank you. This Baked Sweet and Sour Chicken is a win-win situation!
Variations to Spice Things Up
Feeling adventurous? Here are a few variations to take your Baked Sweet and Sour Chicken to the next level:
- **Spicy Sweet and Sour Chicken:** Add a pinch of red pepper flakes or a drizzle of sriracha to the sauce for a fiery kick.
- **Honey Garlic Sweet and Sour Chicken:** Replace the brown sugar with honey and add a clove of minced garlic to the sauce for a sweeter and more aromatic flavor.
- **Lemon Sweet and Sour Chicken:** Add a tablespoon of lemon juice to the sauce for a brighter and more citrusy flavor.
- **Cashew Sweet and Sour Chicken:** Sprinkle a handful of roasted cashews over the finished dish for added crunch and nutty flavor.
These variations are just a starting point. Feel free to experiment with different flavors and ingredients to create your own signature Baked Sweet and Sour Chicken.
Tips for the Perfect Baked Sweet and Sour Chicken Every Time
- **Don’t overcook the chicken:** Overcooked chicken will be dry and tough. Use a meat thermometer to ensure that it reaches an internal temperature of 165°F (74°C).
- **Use fresh ingredients:** Fresh ingredients will always result in a more flavorful dish.
- **Taste and adjust the sauce:** The sauce is the heart of this dish, so make sure it’s perfectly balanced to your liking.
- **Don’t be afraid to experiment:** This recipe is a great starting point, but feel free to customize it to your own taste preferences.
With these tips in mind, you’re well on your way to creating the most delicious Baked Sweet and Sour Chicken you’ve ever tasted. Get ready to impress your friends and family with your culinary skills!
Conclusion for Baked Sweet and Sour Chicken:
This recipe for Baked Sweet and Sour Chicken is a guaranteed crowd-pleaser. It’s easier than ordering takeout and healthier too. Remember to avoid overcooking the chicken for optimal juiciness, and don’t hesitate to adjust the sweet and sour levels to your liking. Feel free to experiment with different vegetables or toppings to create your own unique version. Ultimately, this is a fun, flavorful, and satisfying meal that will leave everyone wanting more.
Print
Baked Sweet and Sour Chicken
Delicious baked sweet and sour chicken recipe with detailed instructions and nutritional information.
- Total Time: 35 minutes
- Yield: 4 servings 1x
Ingredients
- Chicken thighs (boneless, skinless) 2 lbs
- Cornstarch 1/2 cup
- Vegetable oil 2 tbsp
- Pineapple chunks (canned) 1 (20 ounce) can, drained
- Green bell pepper 1 medium, chopped
- Red bell pepper 1 medium, chopped
- Sweet and sour sauce 1 (16 ounce) bottle
- Cooked white rice for serving
Instructions
- Step 1: Preheat oven to 375 degrees F (190 degrees C). Lightly grease a 9×13 inch baking dish.
- Step 2: Cut the chicken thighs into 1-inch pieces. Place the chicken in a bowl and toss with cornstarch until evenly coated.
- Step 3: Heat the vegetable oil in a large skillet over medium-high heat. Add the chicken and cook until browned on all sides. The chicken does not need to be fully cooked at this stage.
- Step 4: In the prepared baking dish, combine the browned chicken, pineapple chunks, green bell pepper, red bell pepper, and sweet and sour sauce. Stir well to ensure everything is evenly coated.
- Step 5: Bake in the preheated oven for 30-40 minutes, or until the chicken is cooked through and the sauce is bubbly.
- Step 6: Serve hot over cooked white rice.
Notes
- Store leftovers in an airtight container in the refrigerator for up to 3 days.
- For best results, reheat in the oven at 350°F until warmed through, which will prevent the chicken from becoming rubbery.
- Serve over rice, quinoa, or noodles with a sprinkle of toasted sesame seeds for added flavor and texture.
- For a richer flavor, try marinating the chicken in a little of the sweet and sour sauce for 30 minutes before coating with cornstarch.
- Prep Time: 15 minutes
- Cook Time: 20 minutes
- Method: Stovetop
- Cuisine: American
FAQs:
What is the secret to perfectly tender Baked Sweet and Sour Chicken?
The real magic lies in two things: First, don’t overcook your chicken! Nobody wants dry, rubbery poultry. Aim for that sweet spot where it’s cooked through but still juicy. Second, a cornstarch slurry before baking helps create that lovely, slightly sticky texture that clings to the tangy sauce. Think of it like a tiny spa day for your chicken, prepping it for ultimate sauce absorption. And remember, patience is a virtue, especially when you’re waiting for that golden-brown deliciousness to emerge from the oven.
Can I make Baked Sweet and Sour Chicken ahead of time?
Absolutely! In fact, this dish is often even better the next day. The flavors meld together beautifully in the refrigerator. Prepare the chicken and sauce separately, then combine them before reheating in the oven. Just be sure to store it in an airtight container. Leftovers are your friend, especially on those busy weeknights when cooking feels like climbing Mount Everest. It transforms into a delightful lunch, offering a sweet and savory pick-me-up to conquer the afternoon slump.
What are some good side dishes to serve with Baked Sweet and Sour Chicken?
The possibilities are endless! Classic steamed rice is always a winner, providing a neutral canvas for the flavorful sauce. For a healthier option, try quinoa or brown rice. Roasted vegetables like broccoli, bell peppers, and onions add a pop of color and nutrients. And for a touch of fun, egg rolls or spring rolls make a great appetizer. Think of it as building your own personalized flavor adventure. Each bite a delightful dance of sweet, sour, and savory goodness.
Is it possible to adjust the sweetness or sourness in this Baked Sweet and Sour Chicken recipe?
Definitely! This recipe is just a starting point, feel free to tailor it to your preferences. Add more vinegar for a tangier kick, or increase the sugar or honey for a sweeter profile. Taste as you go and adjust accordingly. Cooking is all about experimentation and finding what flavors you love. Think of yourself as a culinary artist, tweaking and perfecting your masterpiece until it sings to your taste buds. Don’t be afraid to get creative and make it your own!


Leave a Comment