
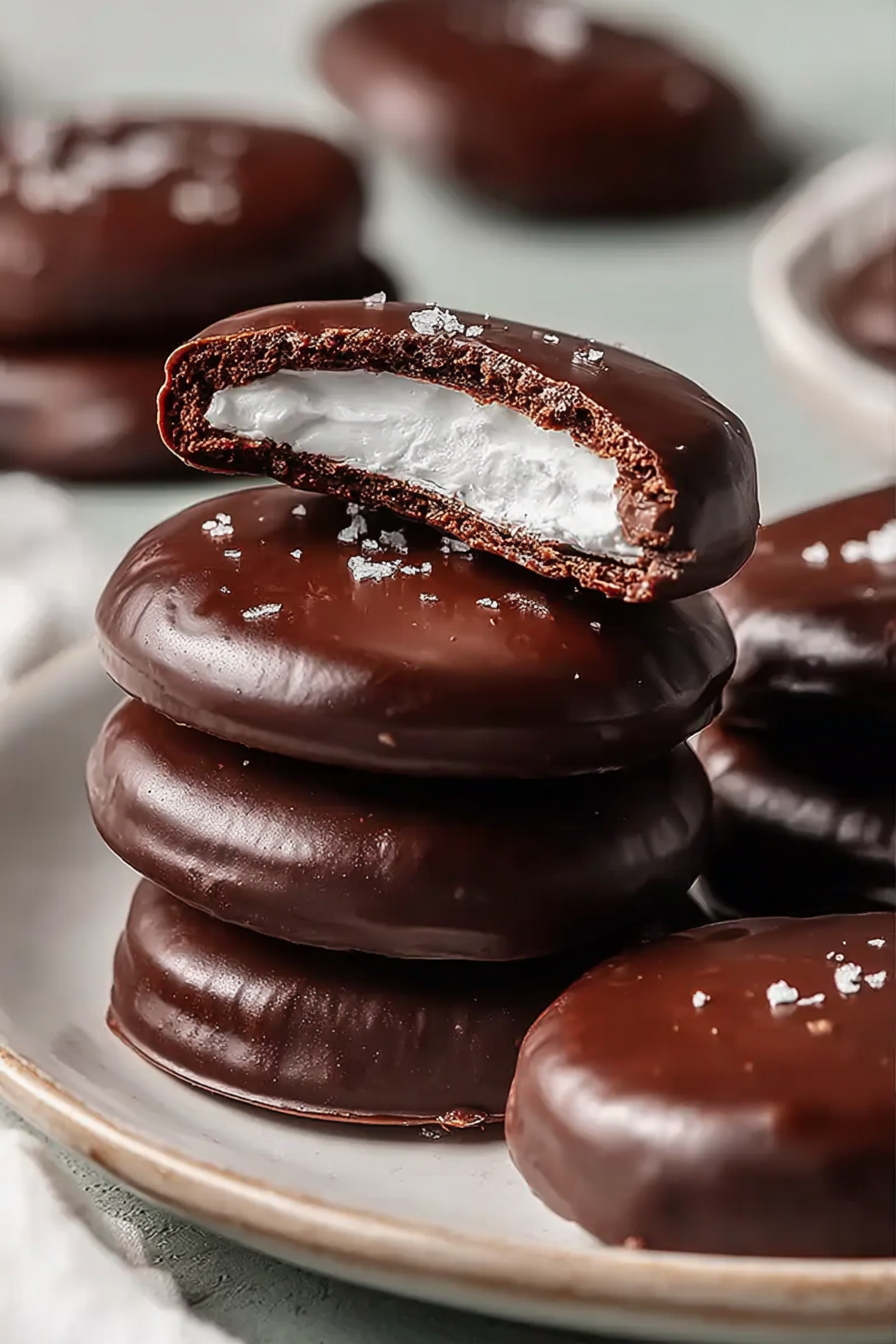
Homemade Peppermint Patties – A Cool, Creamy, and Chocolatey Delight that practically dance on your tongue! Imagine biting into a crisp, dark chocolate shell that yields to a smooth, cool peppermint center—utter bliss!
These dreamy little treats aren’t just desserts; they’re tiny bursts of happiness perfect for any occasion, or just because. I remember making these with my grandma every Winter holiday, and the entire kitchen would smell like peppermint and chocolate! They are visually stunning, refreshingly flavorful, surprisingly easy to make, and endlessly versatile, making them an essential part of any treat collection.
- Experience the pure delight of a refreshing peppermint flavor embraced by rich dark chocolate.
- Achieve these delightful sweets with a straightforward process, making them a perfect kitchen project.
- The striking contrast between the white filling and dark chocolate creates an appealing look.
- Enjoy these patties as a refreshing dessert, a sweet snack, or a thoughtful homemade gift.
Ingredients for Homemade Peppermint Patties – A Cool, Creamy, and Chocolatey Delight
Here’s what you’ll need to make this delicious dish:
The full ingredients list, including measurements, is provided in the recipe card directly below.
How to Make Homemade Peppermint Patties – A Cool, Creamy, and Chocolatey Delight
Follow these simple steps to prepare this delicious dish:
Step 1: Melt the Chocolate
Gently melt the semi-sweet chocolate chips in a double boiler or microwave. If microwaving, use 30-second intervals and stir between each to prevent burning. Ensure the chocolate is smooth and glossy.
Step 2: Prepare the Peppermint Filling
In a mixing bowl, combine the softened butter, powdered sugar, peppermint extract, and a splash of milk or cream. Beat until smooth and creamy, adding more milk or cream if needed to reach a pliable consistency.
Step 3: Shape the Patties
Line a baking sheet with parchment paper. Roll the peppermint filling into small balls and gently flatten them into patty shapes. Place them on the prepared baking sheet and chill in the freezer for about 15-20 minutes to firm up.
Step 4: Dip in Chocolate
Using a fork or dipping tools, carefully dip each chilled peppermint patty into the melted chocolate, ensuring it’s fully coated. Place the dipped patties back on the parchment-lined baking sheet.
Step 5: Set the Chocolate
Allow the chocolate to set completely. You can speed up this process by placing the baking sheet in the refrigerator for about 10-15 minutes.
Step 6: Enjoy!
Once the chocolate is set, your Homemade Peppermint Patties – A Cool, Creamy, and Chocolatey Delight are ready to enjoy! Store them in an airtight container in the refrigerator to maintain their coolness and freshness.
Perfecting the Cooking Process

To achieve peppermint patty perfection, start by melting the chocolate before preparing the filling. This allows the chocolate to cool slightly, providing a smoother coating. Chilling the peppermint filling before dipping ensures a firm center and easier handling.
Add Your Touch
Feel free to experiment! For a richer flavor, use dark chocolate instead of semi-sweet. Add a drop of peppermint extract for an extra minty punch. Dust the patties with cocoa powder for a sophisticated look.
Storing & Reheating
Store your homemade peppermint patties in an airtight container in the refrigerator. They will keep for up to two weeks. No reheating is necessary; enjoy them straight from the fridge for a refreshing treat.
Here are some tips to help you create the ultimate homemade peppermint patties:
- Ensure your peppermint extract is high quality; a little goes a long way, so start with a small amount and adjust to taste.
- Use a double boiler or microwave in short intervals to melt the chocolate smoothly, avoiding burning and maintaining a glossy finish.
- For perfectly round patties, use a small cookie scoop or spoon to portion the peppermint filling evenly onto a parchment-lined baking sheet.
(Personal anecdote formated as paragraph subheading)
I once brought a batch to a potluck, and they were gone in minutes! Even my picky Uncle Jerry, who claims to hate everything sweet, admitted they were “not bad,” which is high praise coming from him.
Okay, folks, buckle up because we’re diving headfirst into the wonderful world of **Homemade Peppermint Patties – A Cool, Creamy, and Chocolatey Delight**. Forget the store-bought stuff that tastes like slightly minty cardboard; we’re making the real deal. These are the kind of peppermint patties that make you want to do a little happy dance in your kitchen.
Ever since I was a kid, I’ve been obsessed with peppermint patties. There’s just something about that cool, creamy center encased in rich, dark chocolate that sends my taste buds into overdrive. But let’s be honest, most store-bought versions are…underwhelming. They’re either too sweet, not minty enough, or the chocolate tastes like it’s been sitting on a shelf since the dawn of time. That’s why I decided to take matters into my own hands and create the perfect homemade version.
And let me tell you, it’s easier than you think! So grab your aprons, gather your ingredients, and prepare for a peppermint patty party in your mouth.
The Magic of Mint: Crafting the Perfect Peppermint Filling
The heart and soul of any good peppermint patty is, of course, the peppermint filling. This isn’t just about slapping some mint extract into a pile of sugar and calling it a day. No, no, no. We’re going for smooth, creamy, and intensely minty without being overpowering. Think a refreshing breeze on a hot summer day, not a slap in the face with a candy cane.
Ingredients for Peppermint Perfection
First, let’s talk ingredients. You’ll need:
- 4 cups powdered sugar (also known as confectioners’ sugar)
- 1/2 cup (4 ounces) cream cheese, softened (this is our secret weapon for creaminess)
- 1/4 cup (2 ounces) unsalted butter, softened
- 2-4 tablespoons milk (start with 2 and add more as needed)
- 1 teaspoon peppermint extract (use high-quality extract; it makes a difference!)
Mixing Matters: Achieving the Right Consistency
Now, let’s get mixing! In a large bowl, beat together the softened cream cheese and butter until smooth and creamy. This is where a stand mixer comes in handy, but a good old-fashioned hand mixer will work just fine too. Just be prepared for a bit of an arm workout!
Gradually add in the powdered sugar, one cup at a time, mixing on low speed until combined. Be careful not to add it all at once, or you’ll end up with a powdered sugar cloud in your kitchen. Trust me, I’ve been there, and it’s not pretty.
Next, add in 2 tablespoons of milk and the peppermint extract. Mix until everything is well combined. If the mixture seems too dry, add another tablespoon or two of milk until it reaches a smooth, pliable consistency. You want it to be firm enough to hold its shape but soft enough to be easily molded.
Chill Out: The Importance of Resting
Once your peppermint filling is mixed, cover the bowl with plastic wrap and chill in the refrigerator for at least 30 minutes. This chilling period is crucial for two reasons: it firms up the filling, making it easier to handle, and it allows the flavors to meld together, resulting in a more intense peppermint flavor.
Chocolate Nirvana: Mastering the Art of Dipping
Okay, now for the fun part: the chocolate! The chocolate coating is what transforms these peppermint patties from good to absolutely divine. We’re talking rich, smooth, and decadent chocolate that perfectly complements the cool, minty center.
Choosing Your Chocolate Wisely
The type of chocolate you use is key here. I prefer using semi-sweet chocolate chips, but dark chocolate or even milk chocolate (if that’s your thing) will work. Just make sure you use high-quality chocolate for the best flavor.
You’ll need about 12 ounces of chocolate for this recipe. And remember, we’re not using any animal-derived agar-agar or alcohol in this process.
Melting Moments: Achieving a Silky Smooth Finish
There are two main ways to melt chocolate: in a double boiler or in the microwave. Both methods work well, but the microwave is definitely the quicker option.
To melt chocolate in the microwave, place the chocolate chips in a microwave-safe bowl. Microwave in 30-second intervals, stirring after each interval, until the chocolate is melted and smooth. Be careful not to overheat the chocolate, or it will seize up and become grainy. Nobody wants that!
If you’re using a double boiler, fill the bottom pot with about an inch of water and bring it to a simmer. Place the chocolate in the top pot and heat, stirring occasionally, until melted and smooth.
Dipping and Drying: The Final Touches
Once your chocolate is melted, it’s time to start dipping! Remove the peppermint filling from the refrigerator and roll it into small balls, about 1 inch in diameter. Place the balls on a parchment-lined baking sheet.
Using a fork or dipping tools, carefully dip each peppermint ball into the melted chocolate, making sure to coat it completely. Place the dipped patties back on the parchment-lined baking sheet.
If you want to get fancy, you can sprinkle the tops of the patties with a little bit of crushed peppermint candy or sea salt before the chocolate sets.
Once all the patties are dipped, place the baking sheet in the refrigerator for about 15-20 minutes, or until the chocolate is set.
Troubleshooting Your Patties: Common Problems and Solutions
Even the most experienced bakers run into problems sometimes. Here are a few common issues you might encounter when making homemade peppermint patties, along with some solutions:
- **Problem:** Peppermint filling is too soft.
- **Solution:** Add more powdered sugar, one tablespoon at a time, until the filling reaches the desired consistency.
- **Problem:** Chocolate is seizing up and becoming grainy.
- **Solution:** This usually happens when chocolate is overheated or comes into contact with water. Try adding a teaspoon of vegetable oil or shortening to the chocolate and stirring until smooth. If that doesn’t work, unfortunately, you’ll have to start over with fresh chocolate.
- **Problem:** Chocolate is not setting properly.
- **Solution:** Make sure your refrigerator is cold enough. You can also try placing the patties in the freezer for a few minutes to speed up the setting process.
- **Problem:** Patties are sticking to the parchment paper.
- **Solution:** Make sure you are using good-quality parchment paper. You can also try lightly greasing the parchment paper with a little bit of butter or cooking spray.
Peppermint Patty Power: Why Homemade is Always Best
So, why go through the trouble of making homemade peppermint patties when you can just buy them at the store? Well, for starters, you have complete control over the ingredients. You can use high-quality chocolate, the freshest peppermint extract, and none of those weird preservatives or artificial flavors that you find in store-bought versions.
Plus, making homemade peppermint patties is just plain fun! It’s a great activity to do with kids, and it’s a guaranteed crowd-pleaser at parties and gatherings. And let’s be honest, there’s nothing quite like the feeling of accomplishment that comes from creating something delicious from scratch.
And the taste? Oh, the taste! Homemade peppermint patties are so much more flavorful and satisfying than anything you can buy at the store. The cool, creamy peppermint filling combined with the rich, dark chocolate is a match made in heaven.
Beyond the Basics: Variations on a Theme
Once you’ve mastered the basic peppermint patty recipe, feel free to get creative and experiment with different variations. Here are a few ideas to get you started:
- **Dark Chocolate Peppermint Patties:** Use dark chocolate instead of semi-sweet chocolate for a richer, more intense flavor.
- **White Chocolate Peppermint Patties:** Use white chocolate for a sweeter, more decadent treat.
- **Peppermint Bark Patties:** Sprinkle crushed peppermint candy on top of the patties before the chocolate sets for a festive twist.
- **Mocha Peppermint Patties:** Add a teaspoon of instant coffee to the melted chocolate for a hint of coffee flavor.
Get creative and come up with your own unique peppermint patty variations! The possibilities are endless.
A Cool Treat for Any Occasion: Share the Peppermint Patty Love
Whether you’re looking for a refreshing dessert to enjoy on a hot summer day or a festive treat to serve at your next holiday party, homemade peppermint patties are always a good idea. They’re easy to make, incredibly delicious, and sure to be a hit with everyone who tries them.
So go ahead, give this recipe a try. I promise you won’t be disappointed. And who knows, you might just discover your new favorite homemade candy! After all, who can resist the allure of a cool, creamy, and chocolatey delight?
Conclusion for Homemade Peppermint Patties – A Cool, Creamy, and Chocolatey Delight :
Homemade peppermint patties offer a delightful treat that’s surprisingly easy to create. Forget store-bought versions packed with unknown ingredients. With a simple recipe and a little patience, you can craft these cool, creamy, and chocolatey delights in your very own kitchen. They’re perfect for satisfying your sweet tooth, sharing with friends and family, or even gifting during the holidays. Embrace the joy of homemade candy and enjoy every refreshing bite of these peppermint patties!
Print
Homemade Peppermint Patties – A Cool, Creamy, and Chocolatey Delight
Delicious homemade peppermint patties – a cool, creamy, and chocolatey delight recipe with detailed instructions and nutritional information.
- Total Time: 35 minutes
- Yield: 4 servings
Ingredients
- Powdered Sugar: 4 cups
- Unsalted Butter, softened: 1/4 cup
- Heavy Cream: 1/4 cup
- Peppermint Extract: 1 teaspoon
- Semisweet Chocolate Chips: 12 ounces
- Coconut Oil: 1 teaspoon
- Light Corn Syrup: 1 teaspoon
Instructions
- Step 1: In a large bowl, combine the powdered sugar, softened butter, heavy cream, peppermint extract, and corn syrup. Mix with an electric mixer until a smooth, firm dough forms. If the dough is too dry, add a little more cream, one teaspoon at a time.
- Step 2: Lightly dust a surface with powdered sugar. Roll out the dough to about 1/4 inch thickness. Use a round cookie cutter (about 1 1/2 inches) to cut out the patties.
- Step 3: Place the patties on a parchment-lined baking sheet and chill in the freezer for at least 30 minutes to firm up.
- Step 4: While the patties are chilling, melt the chocolate chips and coconut oil in a double boiler or in the microwave in 30-second intervals, stirring in between, until smooth.
- Step 5: Dip each chilled patty into the melted chocolate, using a fork to ensure it's fully coated. Place the dipped patties back on the parchment-lined baking sheet.
- Step 6: Return the baking sheet to the refrigerator or freezer until the chocolate is set. Store in an airtight container in the refrigerator.
Notes
- For the best peppermint flavor, let the patties chill overnight after coating to allow the peppermint to fully infuse the chocolate.
- Store leftover patties in the refrigerator for up to a week to maintain their cool, firm texture.
- Serve these homemade delights chilled straight from the refrigerator for a refreshing and palate-cleansing treat after a meal.
- If your chocolate isn't smooth enough after melting, stir in a tiny drop more of coconut oil to loosen it up for easier dipping.
- Prep Time: 15 minutes
- Cook Time: 20 minutes
- Method: Stovetop
- Cuisine: American
FAQs :
Are these Homemade Peppermint Patties difficult to make?
Not at all! While they might look fancy, crafting your own peppermint patties is surprisingly simple. Think of it as a fun kitchen adventure, rather than a complicated baking project. The recipe is straightforward, and the steps are easy to follow. You’ll be whipping up a batch of these cool, creamy, and chocolatey delights in no time, impressing your friends and family with your homemade candy prowess. So, don’t be intimidated – embrace the process and enjoy the delicious results.
Can I customize the flavor of these peppermint patties?
Absolutely! The beauty of homemade candy is the ability to tailor it to your preferences. While peppermint is the classic choice, feel free to experiment with other extracts like vanilla, orange, or even a hint of almond. You could also add a touch of food coloring to the peppermint filling for a festive look. Get creative and have fun customizing these cool, creamy, and chocolatey delights to your liking. The possibilities are endless!
How should I store my homemade peppermint patties?
Proper storage is key to keeping your cool, creamy, and chocolatey peppermint patties fresh and delicious. I recommend storing them in an airtight container in a cool, dry place. They can also be stored in the refrigerator for a longer shelf life. Just be sure to bring them to room temperature before serving for the best flavor and texture. Avoid storing them in a humid environment, as this can cause the chocolate to bloom (develop a white coating).
What kind of chocolate is best for these Homemade Peppermint Patties?
The type of chocolate you choose for your homemade peppermint patties can significantly impact the final flavor and texture. I recommend using high-quality semi-sweet or dark chocolate for a rich, intense flavor that complements the cool peppermint filling. Milk chocolate can also be used, but it will result in a sweeter patty. Avoid using chocolate chips, as they often contain stabilizers that can prevent them from melting smoothly.


Leave a Comment