
Oreo Balls, those bite-sized spheres of chocolatey bliss, are like tiny celebrations in your mouth. Each nibble delivers a delightful crunch, followed by a creamy, dreamy center that will make you question everything you thought you knew about dessert.
These delightful treats are not just food; they’re tiny balls of happiness, perfect for any gathering or a sneaky midnight snack. Imagine the sweet satisfaction of biting into an Oreo Ball – it’s the dessert equivalent of receiving a warm hug on a cold day.
- Effortless to create, ideal for quick dessert cravings or last-minute parties.
- A harmonious blend of crunchy chocolate cookies and velvety cream cheese filling.
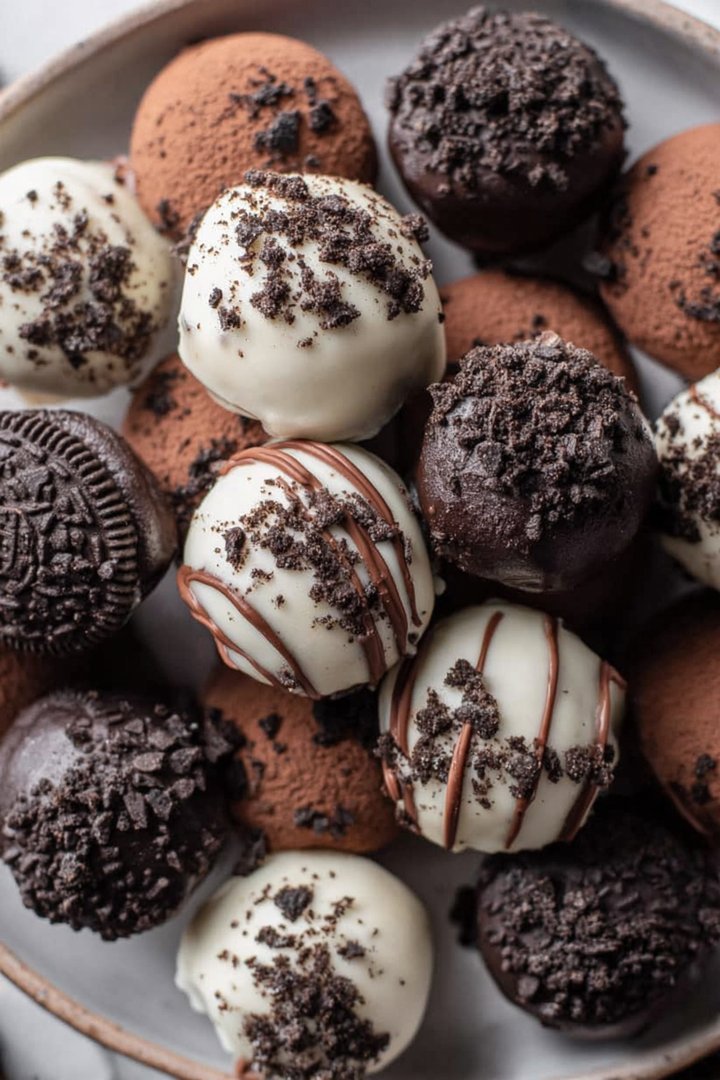
- Visually appealing, perfect for impressing guests or elevating any dessert table.
- Easily customizable with various coatings and sprinkles for personalized flavors.
Ingredients for Oreo Balls
Here’s what you’ll need to make this delicious dish:
The full ingredients list, including measurements, is provided in the recipe card directly below.
How to Make Oreo Balls
Follow these simple steps to prepare this delicious dish:
Step 1: Crush the Oreos
Place the Oreo cookies in a food processor and pulse until they are finely crushed. Alternatively, place them in a large zip-top bag and crush them with a rolling pin. Ensure no large chunks remain for a smooth texture.
Step 2: Combine Oreo Crumbs and Cream Cheese
In a large bowl, combine the crushed Oreo crumbs and softened cream cheese. Mix until the mixture is well combined and forms a dough-like consistency. It should be easy to roll into balls without being too sticky.
Step 3: Form the Oreo Balls
Roll the Oreo mixture into 1-inch balls. Place the balls on a baking sheet lined with parchment paper. This prevents them from sticking and makes the coating process easier.
Step 4: Chill the Oreo Balls
Place the baking sheet with the Oreo Balls in the freezer for at least 30 minutes. This helps them firm up, making them easier to dip in the melted chocolate without falling apart.
Step 5: Melt the Chocolate
In a heatproof bowl set over a saucepan of simmering water (or in the microwave in 30-second intervals), melt the semi-sweet chocolate chips and vegetable shortening, stirring until smooth. Ensure no water gets into the chocolate, as this can cause it to seize.
Step 6: Dip and Decorate
Dip each chilled Oreo Ball into the melted chocolate, ensuring it is fully coated. Use a fork or dipping tools to remove the ball from the chocolate and tap off any excess. Place the dipped balls back on the parchment-lined baking sheet and immediately sprinkle with your favorite sprinkles.
Transfer to a serving plate and watch as they disappear in seconds. These Oreo Balls are perfect for parties, gatherings, or just a simple sweet treat!
Why This Oreo Ball Recipe Rocks (formatted as H2 subheading)
Let’s face it, there are approximately a gazillion recipes for Oreo Balls floating around the internet. So, why should you trust *this* particular recipe? Well, buckle up, buttercup, because I’m about to tell you!
First off, this recipe is foolproof. I’m talking “even-your-slightly-clumsy-uncle-could-make-them” foolproof. We keep the ingredient list short and sweet, and the instructions are crystal clear. No fancy techniques or hard-to-find ingredients here. Just simple, straightforward deliciousness.
Secondly, we’re all about the *texture*. You see, some Oreo Ball recipes end up with a grainy, dry filling. Not ours! The secret is using *fully* softened cream cheese. Seriously, don’t skimp on the softening. Give it a good hour at room temperature, or even a quick zap in the microwave if you’re impatient (just don’t melt it!). This ensures a creamy, dreamy center that will melt in your mouth.
And finally, let’s talk about chocolate. We use a touch of vegetable shortening to create a smooth, glossy coating that won’t crack or crumble when you bite into it. Trust me, this little trick makes all the difference.
Tips and Tricks for the Best Oreo Balls (formatted as H2 subheading)
Want to take your Oreo Ball game to the next level? Of course, you do! Here are a few extra tips and tricks to ensure your creations are the envy of every dessert table:
Oreo Flavor Variations (formatted as H3 subheading)
Don’t be afraid to experiment with different Oreo flavors! Golden Oreos, Mint Oreos, Peanut Butter Oreos – the possibilities are endless. Each flavor will add a unique twist to your Oreo Balls. Imagine the possibilities!
Coating Options Galore (formatted as H3 subheading)
While semi-sweet chocolate is a classic choice, feel free to branch out. White chocolate, dark chocolate, even candy melts can be used to coat your Oreo Balls. Get creative with colors and flavors! Consider using melted peanut butter for a decadent twist, or even adding a swirl of caramel.
Storage Solutions (formatted as H3 subheading)
Oreo Balls are best stored in an airtight container in the refrigerator. They’ll keep for up to a week (if they last that long!). You can also freeze them for longer storage. Just thaw them in the refrigerator before serving.
Presentation is Key (formatted as H3 subheading)
presentation adds to the enjoyment. Arrange your Oreo Balls on a pretty platter or in mini cupcake liners. A sprinkle of edible glitter or a drizzle of melted chocolate can also add a touch of elegance.
Frequently Asked Questions About Oreo Balls (formatted as H2 subheading)
Got questions about Oreo Balls? You’re not alone! Here are some of the most frequently asked questions, answered for your convenience:
Can I make Oreo Balls ahead of time? (formatted as H3 subheading)
Absolutely! In fact, Oreo Balls are the perfect make-ahead dessert. They can be made a day or two in advance and stored in the refrigerator until you’re ready to serve them. This makes them ideal for parties and gatherings.
Can I freeze Oreo Balls? (formatted as H3 subheading)
Yes, you can freeze Oreo Balls for longer storage. Place them in an airtight container or freezer bag and freeze for up to two months. Thaw them in the refrigerator before serving.
My Oreo Balls are cracking after I dip them in chocolate. What am I doing wrong? (formatted as H3 subheading)
This usually happens when the Oreo Balls are too cold or the chocolate is too hot. Make sure your Oreo Balls are chilled, but not rock solid frozen. Also, avoid overheating the chocolate. Melt it slowly and stir frequently to prevent it from burning.
Can I use a different type of cookie besides Oreos? (formatted as H3 subheading)
While Oreos are the classic choice, you can certainly experiment with other cookies. Chocolate chip cookies, graham crackers, or even vanilla wafers can be used to create a similar treat. Just adjust the amount of cream cheese as needed to achieve the right consistency.
Oreo Balls: The Verdict (formatted as H2 subheading)
So, there you have it – everything you need to know to make the most amazing Oreo Balls ever. They’re easy to make, incredibly delicious, and always a crowd-pleaser. Whether you’re looking for a quick dessert for a party or just a sweet treat to satisfy your cravings, Oreo Balls are the perfect choice. So go ahead, give this recipe a try. You won’t regret it!
Remember, baking is all about having fun and experimenting. Don’t be afraid to put your own spin on this recipe and make it your own. And most importantly, don’t forget to share your creations with the world (or at least with your friends and family!). Happy baking!
Perfecting the Cooking Process
To achieve the best results when making these delightful treats, start by chilling the dough for easy handling. This prevents the mixture from becoming too sticky. While the dough is chilling, prepare your melting chocolate for a smooth and even coating.
Add Your Touch
Want to get creative with your Oreo Balls? Consider adding a drop of peppermint extract to the cream cheese mixture for a festive twist. Or, roll the balls in crushed nuts, sprinkles, or shredded coconut instead of dipping them in chocolate for a unique look and flavor.
Storing & Reheating
These little delights are best stored in an airtight container in the refrigerator. They will stay fresh for up to a week. No reheating is required; they are perfect straight from the fridge! That’s if they even last that long.
Here are some pro tips for the best Oreo Ball experience:
- Make sure the Oreo crumbs are finely ground for a smooth texture in the final product; nobody likes gritty balls!
- When melting the chocolate, do it slowly and stir constantly to prevent burning; burnt chocolate tastes like sadness.
- Chilling the Oreo balls before dipping helps the chocolate set faster and prevents the filling from melting out; trust me, this is essential.
(Personal anecdote formated as paragraph subheading)
I remember the first time I made these for a potluck. They were gone in minutes! My friend even asked if I bought them from a fancy bakery. That’s when I knew I had a winning recipe.
Let’s talk about these little spheres of joy – these decadent Oreo Balls. You know, the kind that makes you question all your life choices, like, “Why haven’t I been eating these every day?” I’m serious!
I used to think making impressive desserts was reserved for those fancy pastry chefs on TV. You know the ones who yell about fondant and temper chocolate with the precision of a brain surgeon. But then I stumbled upon this recipe, and my life changed forever. I’m not exaggerating.
These aren’t just dessert; they’re an experience. They’re the reason your friends suddenly become obsessed with you. They’re why you’ll find yourself sneaking into the kitchen at midnight for “just one more.” They’re Oreo Balls. Get ready.
Oreo Balls: A Love Story
It all starts with the humble Oreo. The cookie of our childhoods, the king of the snack aisle, the…okay, I’ll stop. But seriously, Oreos are the foundation of this masterpiece. They’re the chocolatey canvas upon which we paint our culinary dreams.
Then comes the cream cheese. Yes, cream cheese! Don’t look at me like that. It’s the secret weapon that binds everything together, creating a texture so smooth and creamy, it’s almost illegal. It’s like a velvet hug for your taste buds.
And finally, the chocolate coating. The grand finale. The curtain call. It’s the layer of pure, unadulterated bliss that encases these little treasures. Whether you go for dark, milk, or white chocolate, the choice is yours. Just make sure it’s good quality stuff. You deserve it.
Why These Oreo Balls Are Different
You might be thinking, “Oreo Balls? I’ve seen those before.” But trust me, these are different. These have that extra *je ne sais quoi*. Maybe it’s the perfect ratio of Oreo to cream cheese. Maybe it’s the love and care I put into each batch. Or maybe it’s just pure magic.
I’ve tweaked and perfected this recipe over years of trial and error. I’ve tasted the good, the bad, and the downright ugly (let’s just say, don’t use expired cream cheese). And now, I’m sharing the ultimate version with you.
Forget complicated techniques and fancy equipment. This recipe is so easy, a toddler could make it. Okay, maybe not a toddler. But definitely someone with a questionable cooking background like myself.
Gather Your Supplies: The Oreo Balls Arsenal
Before we dive into the nitty-gritty, let’s make sure you have everything you need. This isn’t brain surgery, but a little preparation never hurt anyone.
Here’s your shopping list:
- One package of Oreo cookies (the regular kind, but feel free to experiment)
- One block (8 ounces) of cream cheese, softened (very important!)
- Chocolate for melting (chips, bars, whatever floats your boat)
- Optional: Sprinkles, crushed nuts, sea salt (for that extra pizzazz)
And here are the tools of the trade:
- A food processor (or a Ziploc bag and a rolling pin for the adventurous)
- A mixing bowl
- A baking sheet lined with parchment paper (because nobody likes sticky messes)
- A double boiler or microwave-safe bowl
- A fork or dipping tools (chopsticks work in a pinch!)
Step-by-Step: The Oreo Ball Odyssey
Alright, let’s get down to business. Here’s how to transform those humble ingredients into bite-sized pieces of heaven.
1. **Crush the Oreos: ** Throw those Oreos into your food processor and pulse until they’re finely ground. If you’re going the Ziploc route, put the cookies in the bag, seal it tight, and unleash your inner rage with a rolling pin. The finer, the better! Think beach sand, not gravel.
2. **Mix It Up: ** In a mixing bowl, combine the Oreo crumbs and the softened cream cheese. Mix until everything is well combined. It should form a nice, smooth dough. If it’s too dry, add a tiny splash of milk. If it’s too wet, add more Oreo crumbs. You’re aiming for Goldilocks territory: just right.
3. **Roll Them Out: ** Grab a small amount of dough and roll it into a ball about one inch in diameter. Place the balls on the parchment-lined baking sheet. This is where you can unleash your inner sculptor. Aim for consistency! Unless you want some giant ones and some tiny ones. That’s fine too.
4. **Chill Out: ** Pop the baking sheet into the freezer for at least 30 minutes. This step is crucial! Chilling the balls helps them hold their shape and prevents them from melting into a puddle of sadness when you dip them in chocolate.
5. **Melt the Chocolate: ** While the balls are chilling, melt your chocolate using a double boiler or in the microwave. If microwaving, do it in 30-second intervals, stirring in between, to avoid burning. Burnt chocolate is the enemy.
6. **Dip and Decorate: ** Remove the Oreo balls from the freezer. Dip each ball into the melted chocolate, making sure it’s fully coated. Place it back on the parchment paper. Now’s the time to get creative! Sprinkle with sea salt, crushed nuts, or whatever your heart desires.
7. **Set and Serve: ** Let the chocolate set completely. You can speed this up by putting them back in the freezer for a few minutes. Once they’re set, they’re ready to be devoured!
Troubleshooting: When Oreo Balls Go Wrong
Even the best recipes can have their hiccups. Here are some common issues and how to fix them:
- **Balls are too sticky:** Add more Oreo crumbs to the mixture.
- **Chocolate is seizing:** You probably got some water in the chocolate. Start over with a fresh batch.
- **Chocolate is too thick:** Add a teaspoon of coconut oil or shortening to thin it out.
- **Balls are melting:** Make sure the cream cheese is softened, but not melted. And chill the balls for longer!
Variations: The Oreo Ball Remix
The beauty of this recipe is its versatility. Here are some fun variations to try:
- **Peanut Butter Bliss:** Add a tablespoon of peanut butter to the cream cheese mixture.
- **Mint Chocolate Madness:** Use mint-flavored Oreos and add a drop of peppermint extract to the cream cheese.
- **White Chocolate Wonder:** Use white chocolate for the coating and sprinkle with crushed candy canes.
- **Espresso Explosion:** Add a teaspoon of instant espresso powder to the Oreo crumbs.
Frequently Asked Questions: Oreo Ball Edition
Still have questions? Don’t worry, I’ve got you covered.
- **Can I use a different kind of cookie?** Absolutely! Try using chocolate chip cookies, peanut butter cookies, or even graham crackers.
- **Can I use a different kind of chocolate?** Of course! Milk chocolate, dark chocolate, white chocolate – the choice is yours.
- **How long do these last?** These will last in the refrigerator for up to a week. But let’s be real, they’ll probably be gone in a day.
I hope you enjoy these Oreo Balls as much as I do. They’re perfect for parties, holidays, or just a random Tuesday night when you need a little pick-me-up. So go ahead, grab your ingredients, and get ready to experience the magic of Oreo Balls. You won’t regret it!
Conclusion for Oreo Balls :
Making **Oreo Balls** is truly a breeze. With just a few ingredients and minimal effort, you can whip up a batch of these delightful treats that are sure to impress everyone. From crushing the Oreos to rolling the mixture into perfect spheres and dipping them in melted chocolate, each step is simple and satisfying. So go ahead, give this recipe a try and experience the joy of creating these irresistible bites of happiness.
Print
Oreo Balls
Delicious oreo balls recipe with detailed instructions and nutritional information.
- Total Time: 35 minutes
- Yield: 4 servings 1x
Ingredients
- 36 Oreo cookies
- 8 ounces cream cheese, softened
- 1 teaspoon vanilla extract
- 1/4 cup milk chocolate chips
- 1/4 cup white chocolate chips
- 1 tablespoon vegetable shortening
- Sprinkles (optional)
Instructions
- Step 1: Finely crush the Oreo cookies using a food processor or by placing them in a resealable bag and crushing them with a rolling pin.
- Step 2: In a large bowl, combine the crushed Oreo cookies, softened cream cheese, and vanilla extract. Mix until well combined and a dough-like consistency forms.
- Step 3: Roll the mixture into 1-inch balls and place them on a baking sheet lined with parchment paper.
- Step 4: Melt the milk chocolate chips and white chocolate chips separately in the microwave in 30-second intervals, stirring in between, until smooth. Add 1/2 tablespoon of vegetable shortening to each bowl of melted chocolate to make it smoother.
- Step 5: Dip each Oreo ball into either the melted milk chocolate or white chocolate, coating completely. Place back on the parchment paper.
- Step 6: Immediately sprinkle with sprinkles, if desired, before the chocolate sets. Refrigerate for at least 30 minutes to allow the chocolate to harden.
Notes
- Store Oreo balls in an airtight container in the refrigerator for up to a week, keeping them chilled and fresh.
- These treats are best enjoyed cold, so no reheating is necessary – just grab and enjoy straight from the fridge!
- Serve Oreo balls on a dessert platter alongside other bite-sized sweets for a crowd-pleasing presentation.
- For easier rolling, chill the Oreo-cream cheese mixture for 15-20 minutes before shaping into balls – it'll prevent sticking!
- Prep Time: 15 minutes
- Cook Time: 20 minutes
- Method: Stovetop
- Cuisine: American
FAQs :
What’s the best way to crush Oreos for Oreo Balls?
Listen, you could get all fancy with a food processor, but where’s the fun in that? I prefer the good ol’ ziplock bag and rolling pin method. It’s therapeutic, a great stress reliever after a long day, and you get to take out any pent-up aggression on those innocent cookies! Just make sure the bag is sealed tight, unless you want an Oreo explosion all over your kitchen. Trust me, cleaning up a cookie blizzard is *not* as fun as it sounds. The goal is a fine crumb, perfect for bonding with the cream cheese to create the magical **Oreo Balls**.
Can I use different flavors of Oreos for my Oreo Balls recipe?
Absolutely! This is where you can really let your creativity shine. Mint Oreos? Birthday Cake Oreos? Chocolate Hazelnut Oreos? The possibilities are endless! Just imagine the flavor combinations! Each flavor of Oreo brings a unique twist to the classic **Oreo Balls**. Pro tip: Consider the color of the filling when choosing your Oreos, as this will affect the final color of your delicious treats. You could even mix and match for a multicolored platter of deliciousness!
How long do Oreo Balls last and how should I store them?
These little bites of joy are best enjoyed fresh, but they’ll happily hang out in the refrigerator for up to a week (if they last that long!). Store them in an airtight container to prevent them from drying out or absorbing any weird fridge smells. For longer storage, you can freeze them for up to a month. Just let them thaw in the fridge before serving. Remember, properly stored **Oreo Balls** are happy Oreo Balls, ready to be devoured at a moment’s notice.
My Oreo Balls are too sticky, what did I do wrong?
Uh oh, sticky situation! This usually happens if there’s too much cream cheese in the mixture. Don’t panic! Simply add more crushed Oreos, a little at a time, until you reach a workable consistency. The mixture should be firm enough to roll into balls without sticking to your hands. Also, ensure your cream cheese is properly softened, but not melted. Finding the right ratio is key to perfect **Oreo Balls**. It’s a culinary balancing act, I tell ya!


Leave a Comment