
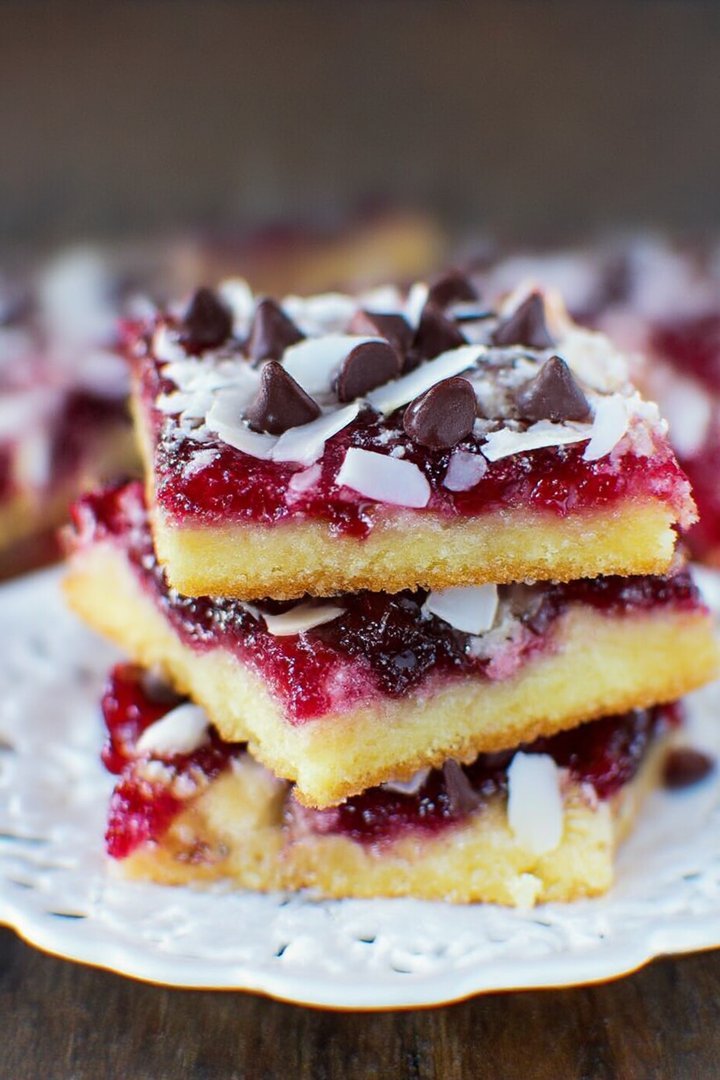
Imagine biting into a bar where the tangy burst of raspberries dances with the sweet, tropical embrace of coconut, all nestled upon a buttery, crumbly base. That’s the magic we’re talking about with these Raspberry Coconut Magic Bars.
They are unbelievably easy to whip up, making them the perfect treat when you need something impressive without spending hours in the kitchen. Prepare for a symphony of flavors and textures that will leave everyone begging for more!
Why You’ll Adore These Raspberry Coconut Magic Bars
- They are ridiculously simple to make, requiring minimal effort and ingredients, perfect for even the most kitchen-challenged bakers.
- The delightful combination of tart raspberries, sweet coconut, and a buttery crust creates a flavor explosion in every single bite.
- With their vibrant colors and appealing layers, these bars are a feast for the eyes, making them ideal for parties and gatherings.
- You can easily customize them with different types of nuts, seeds, or even a drizzle of white chocolate for an extra touch of decadence.
Ingredients for Raspberry Coconut Magic Bars
Here’s what you’ll need to make this delicious dish:
The full ingredients list, including measurements, is provided in the recipe card directly below.
How to Make Raspberry Coconut Magic Bars
Follow these simple steps to prepare this delicious dish:
Step 1: Prepare the Crust
Preheat your oven to 350°F (175°C). In a medium bowl, mix the flour and sugar. Cut in the cold butter using a pastry blender or your fingers until the mixture resembles coarse crumbs. Press the mixture evenly into the bottom of an ungreased 9×13 inch baking pan.
Step 2: Add the Condensed Milk
Pour the sweetened condensed milk evenly over the crust. Make sure it covers the entire surface to help bind the other ingredients.
Step 3: Layer the Toppings
Sprinkle the shredded coconut, raspberries, chopped nuts, and chocolate chips evenly over the sweetened condensed milk. Gently press down on the toppings to ensure they adhere to the condensed milk.
Step 4: Bake to Golden Perfection
Bake in the preheated oven for 25-30 minutes, or until the crust is golden brown and the toppings are lightly toasted. Watch carefully to prevent burning.
Step 5: Cool and Cut
Let the bars cool completely in the pan before cutting them into squares. This will help them hold their shape. For cleaner cuts, you can chill the bars in the refrigerator for an hour before slicing.
Step 6: Serve and Enjoy
Cut into squares and serve. These bars are fantastic on their own, but you can also serve them with a scoop of vanilla ice cream or a dollop of whipped cream for an extra indulgent treat.
Perfecting the Cooking Process
To achieve the ultimate Raspberry Coconut Magic Bars, start by layering the crust ingredients evenly and pressing firmly. This ensures a solid base. Bake until golden, then add the toppings sequentially for a beautifully textured and flavorful finish.
Add Your Touch
Feel free to swap raspberries for other berries like blackberries or blueberries, if that is what you are in the mood for. For a richer flavor, consider adding chopped walnuts or pecans to the crust. A sprinkle of lemon zest can brighten the whole dessert!
Storing & Reheating
Store your Raspberry Coconut Magic Bars in an airtight container at room temperature for up to three days. If you want to extend their deliciousness, refrigerate them for up to a week. No reheating is necessary; they are delightful straight from the fridge!
Here are some tips and tricks to make the best Raspberry Coconut Magic Bars:
- Use a high-quality coconut cream to ensure your bars are rich and decadent, lending the most possible flavor that will tantalize your taste buds.
- Gently press the raspberries into the coconut layer to prevent them from burning during baking and dispersing their gorgeous flavors.
- Let the bars cool completely before cutting to maintain their shape and avoid a crumbly mess; patience is key to perfection.
(Personal anecdote formated as paragraph subheading)
I remember making these for a friend’s birthday, and everyone raved about them! One friend even asked for the recipe on the spot. It’s a guaranteed crowd-pleaser and always makes me smile.
Raspberry Coconut Magic Bars: A Sweet Symphony of Flavors
Okay, let’s be honest. Who doesn’t love a good magic bar? Those layered squares of sugary goodness, packed with textures and flavors that somehow, magically, all work together. But let’s elevate things a bit. Forget the same old recipe – we’re diving headfirst into the enchanting world of Raspberry Coconut Magic Bars! Get ready for a taste explosion that will leave you wondering where these have been all your life.
Think of these bars as tiny, edible works of art. A buttery, crumbly crust plays host to a creamy coconut layer, studded with bursts of tart, juicy raspberries. The combination is, dare I say, magical. It’s like a tropical vacation for your taste buds, with a sweet-tart kiss goodbye. And the best part? They are ridiculously easy to make! Even if your baking skills are, shall we say, “enthusiastic” (translation: you once set off the smoke alarm trying to bake cookies), you can totally nail this.
Why These Raspberry Coconut Magic Bars Are a Must-Try
So, what makes these particular magic bars so special? Well, first, there’s the flavor. The raspberry and coconut pairing is a match made in dessert heaven. The sweetness of the coconut perfectly complements the tartness of the raspberries, creating a balanced and utterly addictive treat. It’s an unexpected duo that you’ll want to make again and again.
But it’s not just about the taste. It’s also about the texture. The crumbly crust, the chewy coconut, and the juicy raspberries all come together to create a symphony of textures that will keep your mouth happy with every bite. No boring, one-dimensional desserts here! We’re talking about a full-blown sensory experience.
And did I mention how easy they are to make? Seriously, this recipe is practically foolproof. You just layer the ingredients in a pan, bake, and voila! Magic bars appear. Okay, there’s a little more to it than that, but trust me, it’s easier than ordering takeout.
The Magic Ingredients: What You’ll Need
Before we dive into the recipe, let’s gather our ingredients. Don’t worry, you probably have most of them in your pantry already.
- **For the Crust:** All-purpose flour (the backbone of our buttery dream), granulated sugar (for a touch of sweetness), melted butter (the glue that holds it all together).
- **For the Topping:** Sweetened condensed milk (the magical binder), shredded coconut (the tropical essence), fresh or frozen raspberries (the burst of tartness), chocolate chips (because chocolate makes everything better), chopped nuts (optional, but highly recommended for extra crunch).
See? Nothing too scary. Just a bunch of everyday ingredients that, when combined in the right way, create something truly extraordinary.
Let’s Get Baking: The Step-by-Step Guide
Alright, are you ready to make some magic? Let’s do it!
**Step 1: Preheat and Prep**
First things first, preheat your oven to 350°F (175°C). While the oven is warming up, grease a 9×13 inch baking pan. You can use butter or cooking spray. Or if you’re feeling fancy, line it with parchment paper for easy removal. Because who wants to wrestle with a stuck magic bar?
**Step 2: Make the Crust**
In a medium bowl, combine the flour and sugar. Add the melted butter and mix until the mixture resembles coarse crumbs. Press the mixture evenly into the prepared baking pan. This is your blank canvas, the foundation upon which we will build our masterpiece.
**Step 3: Layer on the Magic**
Now comes the fun part! Pour the sweetened condensed milk evenly over the crust. This is the glue that will hold all of our toppings together. Next, sprinkle the shredded coconut over the condensed milk. Then, scatter the raspberries, chocolate chips, and nuts (if using) evenly over the coconut. Remember, there’s no right or wrong way to do this, just let your creativity flow.
**Step 4: Bake to Golden Perfection**
Place the pan in the preheated oven and bake for 25-30 minutes, or until the top is golden brown and bubbly. Keep an eye on it, as oven temperatures can vary. You want the bars to be cooked through, but not burnt.
**Step 5: Cool and Cut**
Once the bars are baked, remove them from the oven and let them cool completely in the pan before cutting. This is crucial! If you try to cut them while they’re still warm, they’ll be a gooey mess. Trust me, I’ve learned this the hard way. Once they’re cool, cut them into squares and prepare to be amazed.
Tips and Tricks for Baking Success
- **Use room temperature butter:** This will make it easier to combine the crust ingredients and ensure a more even texture.
- **Don’t overbake:** Overbaked magic bars are dry and crumbly. Nobody wants that.
- **Let them cool completely:** I can’t stress this enough! Patience is key to perfect magic bars.
- **Get creative with the toppings:** Feel free to experiment with different types of chocolate chips, nuts, or even dried fruit. The possibilities are endless!
Serving Suggestions: Sharing the Magic
These Raspberry Coconut Magic Bars are delicious on their own, but they’re also great with a scoop of vanilla ice cream or a dollop of whipped cream. Serve them at parties, potlucks, or just as a special treat for yourself. Because you deserve it!
These bars are also perfect for gifting. Wrap them up in a pretty box or tin and give them to your friends, family, or anyone who needs a little bit of magic in their life.
Variations and Adaptations for picky eaters
Want to switch things up a bit? Here are a few variations to try:
- **Tropical Magic Bars:** Add chopped pineapple and macadamia nuts for a taste of the tropics.
- **Chocolate Raspberry Magic Bars:** Double the amount of chocolate chips and add a drizzle of melted chocolate on top.
- **Nut-Free Magic Bars:** Omit the nuts altogether or substitute with sunflower seeds or pumpkin seeds.
Remember, the beauty of magic bars is that they’re incredibly versatile. So don’t be afraid to experiment and create your own signature version.
Raspberry Coconut Magic Bars: The Perfect Ending
So there you have it, folks! My recipe for Raspberry Coconut Magic Bars. I hope you enjoy making (and eating!) them as much as I do. They’re the perfect combination of sweet, tart, and chewy, and they’re guaranteed to bring a smile to your face.
Go forth and bake some magic! And don’t forget to share your creations with me. I’d love to see what you come up with. Happy baking! And remember, a little bit of magic can go a long way. Especially when it comes in the form of a delicious, homemade treat. So treat yourself, treat your friends, and spread the magic! These Raspberry Coconut Magic Bars are proof that sometimes, the simplest things in life are the most magical.
Conclusion for Raspberry Coconut Magic Bars :
These Raspberry Coconut Magic Bars are a guaranteed crowd-pleaser. They are a delightful blend of sweet, tart, and chewy. The buttery graham cracker crust, the creamy sweetened condensed milk, the tangy raspberries, and the toasted coconut combine for a treat that’s both comforting and exciting. Quick to make and easy to customize, these bars are the perfect addition to any gathering. So, go ahead, bake up a batch. You won’t regret it!
Print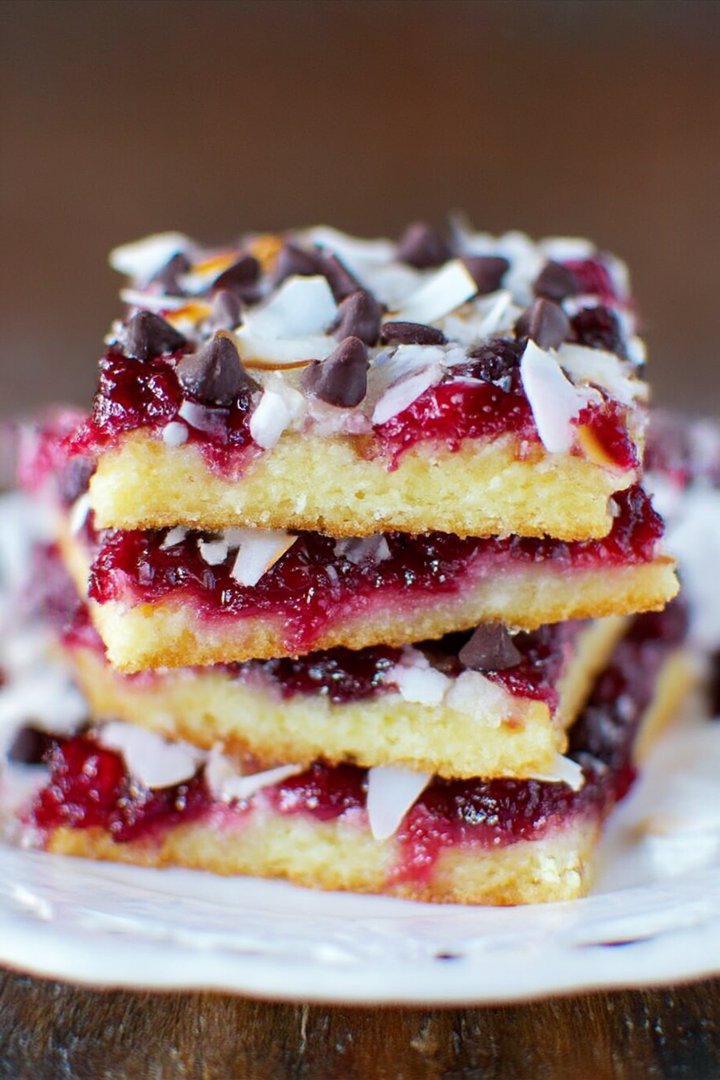
Raspberry Coconut Magic Bars
Delicious raspberry coconut magic bars recipe with detailed instructions and nutritional information.
- Total Time: 35 minutes
- Yield: 4 servings 1x
Ingredients
- 1 1/2 cups graham cracker crumbs
- 1/2 cup (1 stick) unsalted butter, melted
- 1 (14 ounce) can sweetened condensed milk
- 1 cup shredded coconut
- 1 cup frozen raspberries
- 1 cup white chocolate chips
- 1/2 cup chopped walnuts (optional)
Instructions
- Step 1: Preheat oven to 350°F (175°C). Grease a 9×13 inch baking pan.
- Step 2: In a medium bowl, combine graham cracker crumbs and melted butter. Press mixture evenly into the bottom of the prepared pan.
- Step 3: Pour sweetened condensed milk evenly over the graham cracker crust.
- Step 4: Sprinkle shredded coconut, frozen raspberries, white chocolate chips, and chopped walnuts (if using) evenly over the condensed milk layer.
- Step 5: Gently press down on the toppings to help them adhere to the condensed milk.
- Step 6: Bake for 25-30 minutes, or until the top is lightly golden brown. Let cool completely before cutting into bars.
Notes
- Store cooled bars in an airtight container at room temperature for up to 3 days, or in the refrigerator for longer storage.
- If you want a warm, gooey treat, microwave individual bars for 10-15 seconds before serving.
- Dust the finished bars with powdered sugar for an extra touch of elegance when serving.
- For easier slicing, freeze the bars for 30 minutes before cutting; it will help prevent the raspberry and chocolate from smearing.
- Prep Time: 15 minutes
- Cook Time: 20 minutes
- Method: Stovetop
- Cuisine: American
FAQs :
Can I use frozen raspberries for these Raspberry Coconut Magic Bars?
Absolutely! In fact, frozen raspberries might even be preferable. They tend to hold their shape better during baking than fresh raspberries, preventing the bars from becoming overly soggy. Just be sure to add them while still frozen; no need to thaw them beforehand. It is important to note that frozen raspberries may release a little more liquid, so consider increasing the baking time by a few minutes to ensure that the bars are fully set. You will still experience a delectable treat despite this small change!
What’s the best way to store these amazing coconut raspberry bars?
The best way to store these bars is in an airtight container at room temperature. They’ll stay fresh for about 3-4 days. If you live in a warmer climate, or if you want to keep them longer, you can store them in the refrigerator. This will help prevent the coconut from going rancid and extend their shelf life to about a week. Just make sure to bring them to room temperature before serving to fully enjoy their delicious texture and flavor.
How can I make these coconut raspberry magic bars gluten-free?
Making these bars gluten-free is surprisingly easy! Simply swap out the all-purpose flour in the crust for a gluten-free all-purpose flour blend. Ensure the blend contains xanthan gum or add a teaspoon of xanthan gum to the mix for better binding. This will help prevent the crust from becoming too crumbly. Also, double-check that all your other ingredients, like the sweetened condensed milk and coconut, are certified gluten-free to avoid any hidden gluten sources. This substitution should produce delicious, gluten-free magic bars.
Can I substitute other fruits in these raspberry and coconut bars?
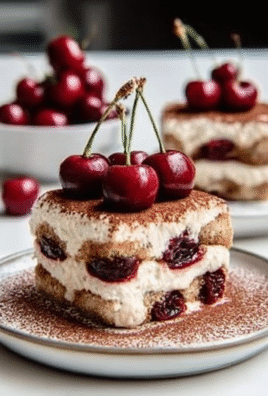
You sure can! While raspberry and coconut are a match made in culinary heaven, you can absolutely experiment with other fruits. Try using blackberries, blueberries, or even chopped cherries for a different twist. Just be sure to use the same amount of fruit as the raspberries in the recipe. You might also consider adjusting the sweetness level depending on the fruit you choose. For example, if using tart cranberries, you might want to add a touch more sugar to the filling.

Leave a Comment